After you design seating charts for your classes, you can use those seating charts to take class or daily attendance each day.
|
Note: By default, Aspen uses a negative attendance model, meaning that students are presumed present unless marked absent by a teacher or staff member. However, administrators can require all courses in the organization to use a positive attendance model, in which students are considered absent unless marked present. This feature can also be enabled for specific course sections. |
To take attendance using seating charts:
- Log on to the Staff view.
- Do one of the following:
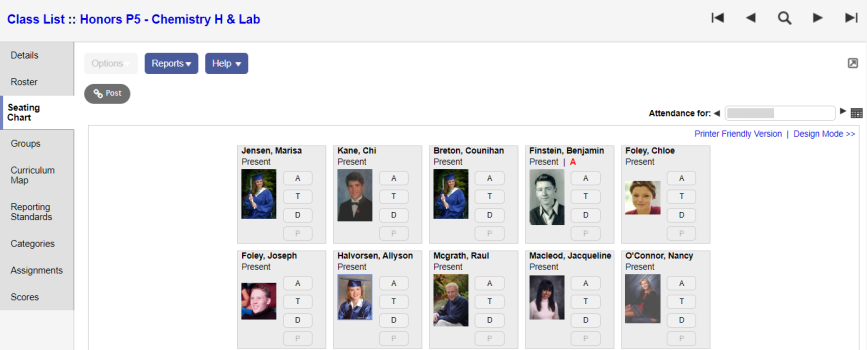
To take class attendance, either:- Click the Attendance tab, then click the Class side-tab. Select a course section, and click Seating Chart on the Class side-tab.
The seating chart you designed for the course appears.
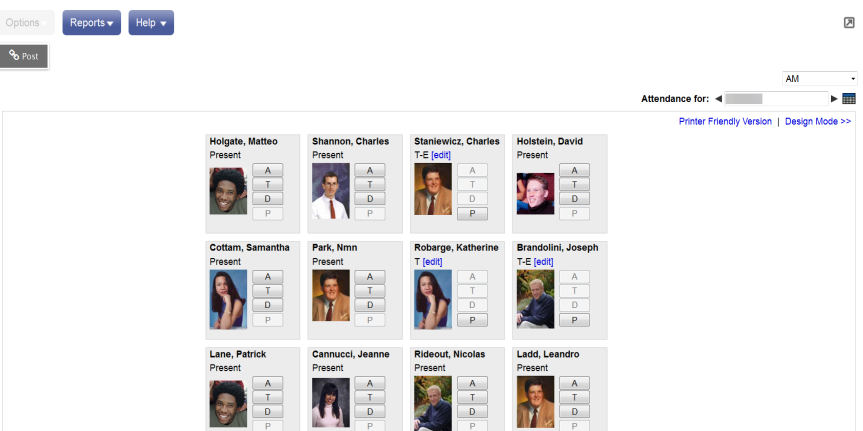
To take daily attendance, click the Attendance tab. Under the Daily side-tab, click Seating Chart. The seating chart for the daily attendance appears.
-
Notes:
-
If you enter daily attendance for two separate homerooms, click the Homeroom drop-down to select the correct one.
-
If you enter daily attendance and your school takes second daily attendance, click the drop-down in the top-right section of the page to select whether you are entering AM or PM daily attendance.
-
When a student's calendar is not in session, the student is grayed out, and the daily and class attendance codes appear as Not in session. This helps prevent teachers from mistakenly marking students absent who are in their homeroom but on a different calendar from the current day (such as kindergartners or seniors).
-
If a student has withdrawn from your course, a red Withdrawn appears below his or her name. This is to ensure that you are aware of the student’s withdrawal. You need to manually remove them from your seating chart. To do so, click Design Mode to drag the student’s name out of the Seating Positions grid.
-
Also, if a new student enro
-
To help substitute teachers, print the seating chart for each of your classes. File the printouts in your "Substitutes" folder so they are available when needed.
-
- If this class spans more than one period (and your school has opted to take attendance during each period of a multi-period class in Preferences), select the current period from the Period drop-down (class attendance only).
- Do one of the following:
- If your administrator has set your school or course section to use negative attendance, all students will be marked Present by default. If a student is not present, click the appropriate code, such as A for absent. If your school wants you to record more information for specific attendance codes, such as tardy, a pop-up prompts you for that information.
- If your administrator has set your school or course section to use positive attendance, all students will be marked Absent by default. If a student is not absent, click the appropriate code, such as P for present. If your school wants you to record more information for specific attendance codes, such as tardy, a pop-up prompts you for that information.
- If your school wants you to record more information for specific attendance codes, such as tardy, a pop-up prompts you for that information. If the Override Reason field appears on the pop-up, then an override reason is required. Click
 and select a code. If you select Other, enter an Activity Comment to describe the reason. Click OK.
 -
Note: If your school takes second daily attendance, and you need to enter other codes for your attendance records, enter the other code for AM in the first Other codes field (on the left), and the other code for PM in the second Other codes field (on the right) in the Class Attendance pop-up: 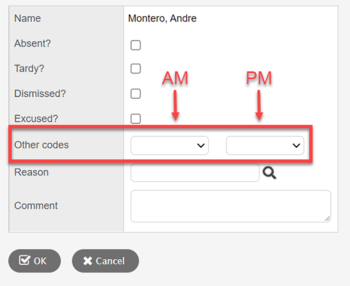
-
Note: If your course section uses positive attendance:
- Prior to posting or saving, a message in the page’s top-right section reminds you to mark students present.
- The P (Present) and A (Absent) codes appear by default.
- Positive attendance applies to class attendance only. It does not apply to daily attendance.
- When you finish taking attendance, click Post.
|
Note: You can hover your cursor over an attendance code to see a description of it. |
|
Note: Depending on your school's or |
|
Note: If this course is flagged to prevent period attendance input, the Post button is grayed-out. If you click an attendance code, the message Attendance is not collected for this course appears. You cannot take period attendance for the class. |