Define student Class Attendance preferences
Define student class attendance preferences for your
As an administrator, you determine the codes you want to appear on the input page.
To define student class attendance preferences:
- Do one of the following:
- To define
- To define
- To define school class attendance preferences: Log on to the School view. Click the associated tab, and click Preferences on the Setup tab.
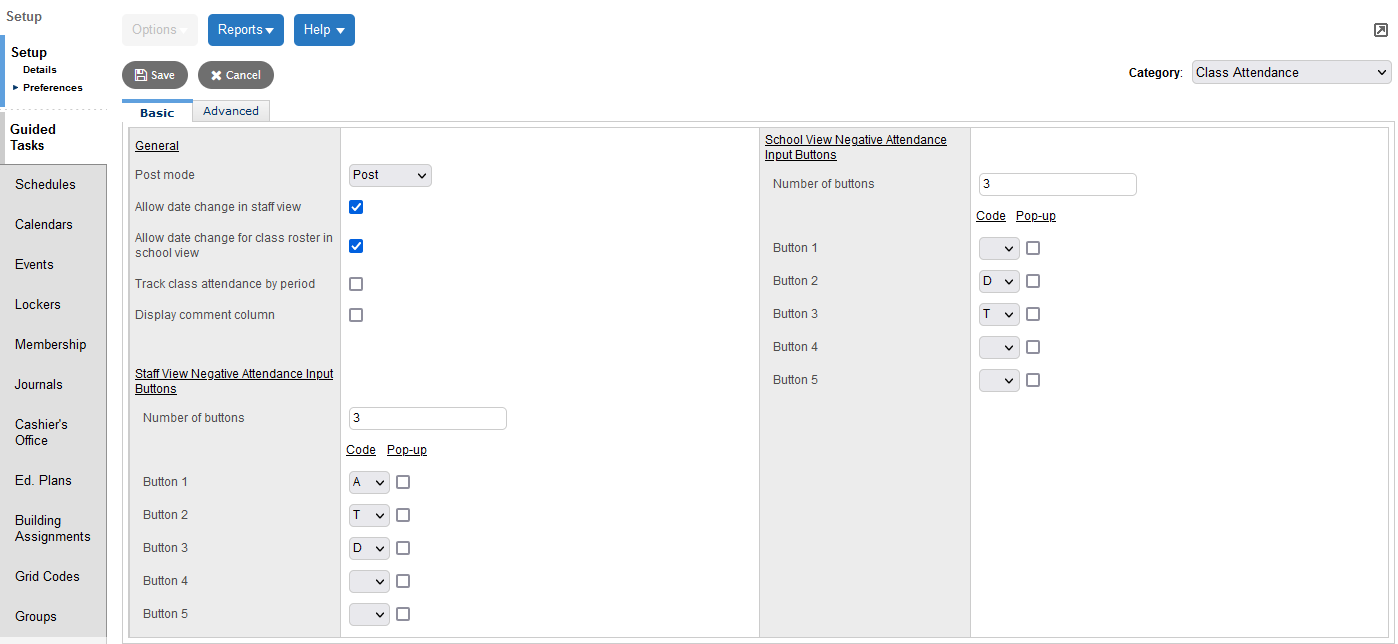
- Click the Category drop-down to select Class Attendance.
-
- Use the table to fill in the fields.
-
Field Description General Post mode
Click this drop-down to select one of the following:
- No Post: Staff can save their class attendance, but cannot post it. The office would need to post class attendance for this mode.
- Post: Staff can post their class attendance multiple times.
- Post Once: Staff can post their class attendance one time. If they need a change to their class attendance after posting, they need to contact the office.
Allow date change in staff view
Select this checkbox if you want staff members to be able to enter class attendance for dates other than today (Staff view, Attendance > Class).
Allow date change for class roster in school view Select this checkbox if you want staff members to be able to enter class attendance for dates other than today (School view, Attendance > Class Roster). Enable Multi Add Button Class office
Select this checkbox if you want the Multi-Add button to appear on the Class Office page, allowing users to enter class attendance for several students (for many periods and dates) at once (School view, Attendance > Class Office).
Track class attendance by period
Select this checkbox if you want teachers to take attendance during each period of a class that spans more than one period. Leave it blank for teachers to take attendance once during a multi-period class.
Note: This field appears in the Display Comment Column Enable this field for a Comment column to appear on the Class Attendance Input page (Staff view, Attendance > Class > Input). When teachers click an attendance code button (other than Present), they can type additional information directly in the Comment column. This lets teachers enter comments in the class attendance record easily, even when the class attendance code button pop-ups are not enabled.
Staff View Negative Attendance Input Buttons
Number of buttons
Type the number of attendance code buttons you want to appear on the input page in the Staff view for courses that use negative attendance.
Button 1
Button 2
Button 3
Button 4
Button 5
Click the drop-downs in the Code column to select the attendance codes you want to appear on the input page in the Staff view for courses using negative attendance. For example, you might select the A, T and D codes to appear on the input page.
For each code, select the Pop-up checkbox if you want users to enter detailed information on a new pop-up page after they click that code.
For example, assume you select the Pop-up checkbox for the D code. If the teacher clicks D on the input page, a pop-up asks for the dismissal time and reason. Otherwise, deselect this checkbox, and users simply click the appropriate code for each student.
Note: The P (Present) code appears by default on the input page for course sections that use negative attendance. School View Negative Attendance Input Buttons Number of buttons Type the number of attendance code buttons you want to appear on the Class Roster input page (School view, Attendance > Class Roster > Students) for courses that use negative attendance.
Button 1
Button 2
Button 3
Button 4
Button 5
Click the drop-downs in the Code column to select the attendance codes you want to appear on the Class Roster input page in the School view for courses using negative attendance. For example, you might select the A, T, and D codes to appear on the input page.
For each code, select the Pop-up checkbox if you want users to enter detailed information on a new pop-up page after they click that code.
For example, assume you select the Pop-up checkbox for the D code. If the teacher clicks D on the input page, a pop-up asks for the dismissal time and reason. Otherwise, deselect this checkbox, and users simply click the appropriate code for each student.
Note: The P (Present) code appears by default on the input page for course sections that use negative attendance.
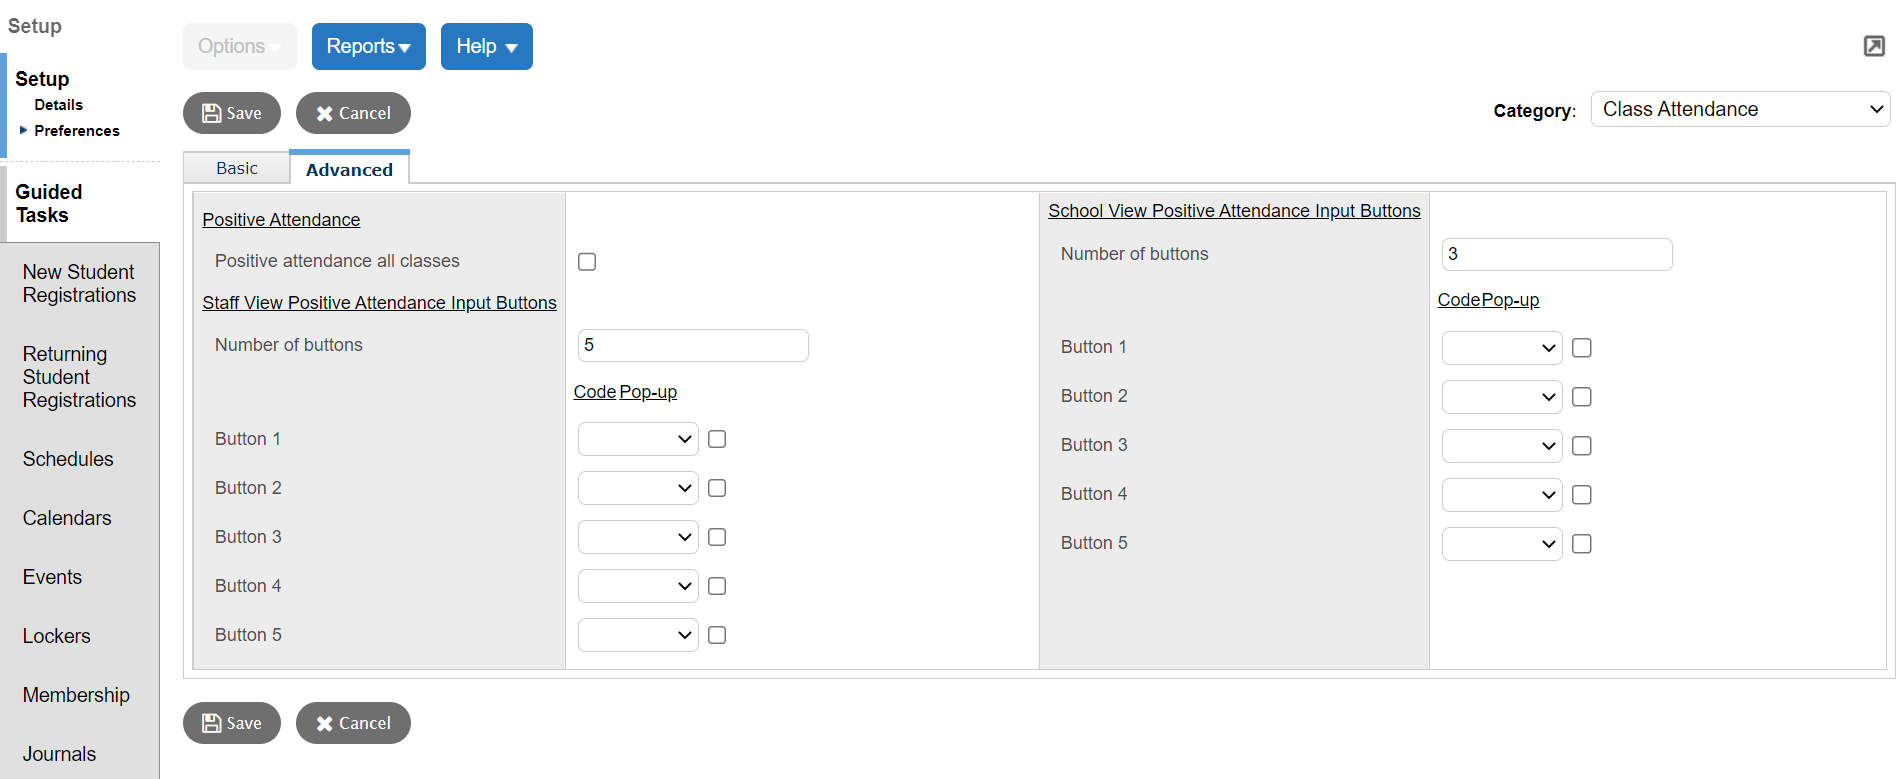
- Click the Advanced sub-tab.
- Use the table to enter information in the fields:
Field Description Attendance Pattern ( Code view pattern
(
Enter the pattern for how you want to see codes when taking attendance. This applies to both the order of the codes and the codes themselves. Enter a | between the codes.
For example, enter A:A|T:T|D:D|E:E| for the following to display:
- Absent to display first as A
- Tardy to display second as T
- Dismissed to display third as D
- Excused to display fourth as E
Note: Teachers can hover over these codes on the Scores page for a description. Add a delimiter, such as a space or semi-colon, between codes for easier viewing. Example: D:D|;|T:T|;|A:A|;|O1|;|O2|;|E:E|
appears in
D - Dismissed;A - AbsentPositive Attendance Positive attendance all classes
Select this checkbox to require all courses in your organization to use a positive attendance model, which considers all students absent by default unless marked present by a teacher or staff member.
This preference only affects how teachers enter class attendance. Regardless of your selection, teachers and attendance managers enter and post daily attendance as they normally would.
Note: This preference appears in the Note: School administrators can also enable positive attendance for specific course sections, while keeping a traditional, negative attendance model for other courses. Note: You cannot take positive attendance in Aspen Mobile at this time. If staff members attempt to take positive attendance in Aspen Mobile, they will receive a warning message, with a link to the traditional desktop version of Aspen. From here, they can proceed to take positive attendance. Staff View Positive Attendance Input Buttons
Number of buttons
Type the number of attendance code buttons you want to appear on the input page in the Staff view for courses that use positive attendance.
Button 1
Button 2
Button 3
Button 4
Button 5
Click the drop-downs in the Code column to select the attendance codes you want to appear on the input page in the Staff view for courses using positive attendance. For example, you might select the T and D codes to appear on the input page.
For each code, select the Pop-up checkbox if you want users to enter detailed information on a new pop-up page after they click that code. For example, assume you select the Pop-up checkbox for the D code. If the teacher clicks D on the input page, a pop-up asks for the dismissal time and reason. Otherwise, deselect this checkbox, and users simply click the appropriate code for each student.
Note: The A (Absent) and P (Present) codes appear by default on the input page for course sections that use positive attendance. School View Positive Attendance Input Buttons Number of buttons
Type the number of attendance code buttons you want to appear on the Class Roster input page (School view, Attendance > Class Roster > Students) for courses that use positive attendance.
Button 1
Button 2
Button 3
Button 4
Button 5
Click the drop-downs in the Code column to select the attendance codes you want to appear on the Class Roster input page in the School view for courses using positive attendance. For example, you might select the T and D codes to appear on the input page.
For each code, select the Pop-up checkbox if you want users to enter detailed information on a new pop-up page after they click that code. For example, assume you select the Pop-up checkbox for the D code. If the teacher clicks D on the input page, a pop-up asks for the dismissal time and reason. Otherwise, deselect this checkbox, and users simply click the appropriate code for each students.
Note: The A (Absent) and P (Present) codes appear by default on the input page for course sections that use positive attendance.
- Click Save.