During the school year, you might need to add course sections to and drop course sections from a student’s schedule.
To make changes to a student schedule:
- Log on to the School view.
- Click the Student tab, and select the student.
- On the Schedule side-tab, click Workspace.
- Do one of the following:
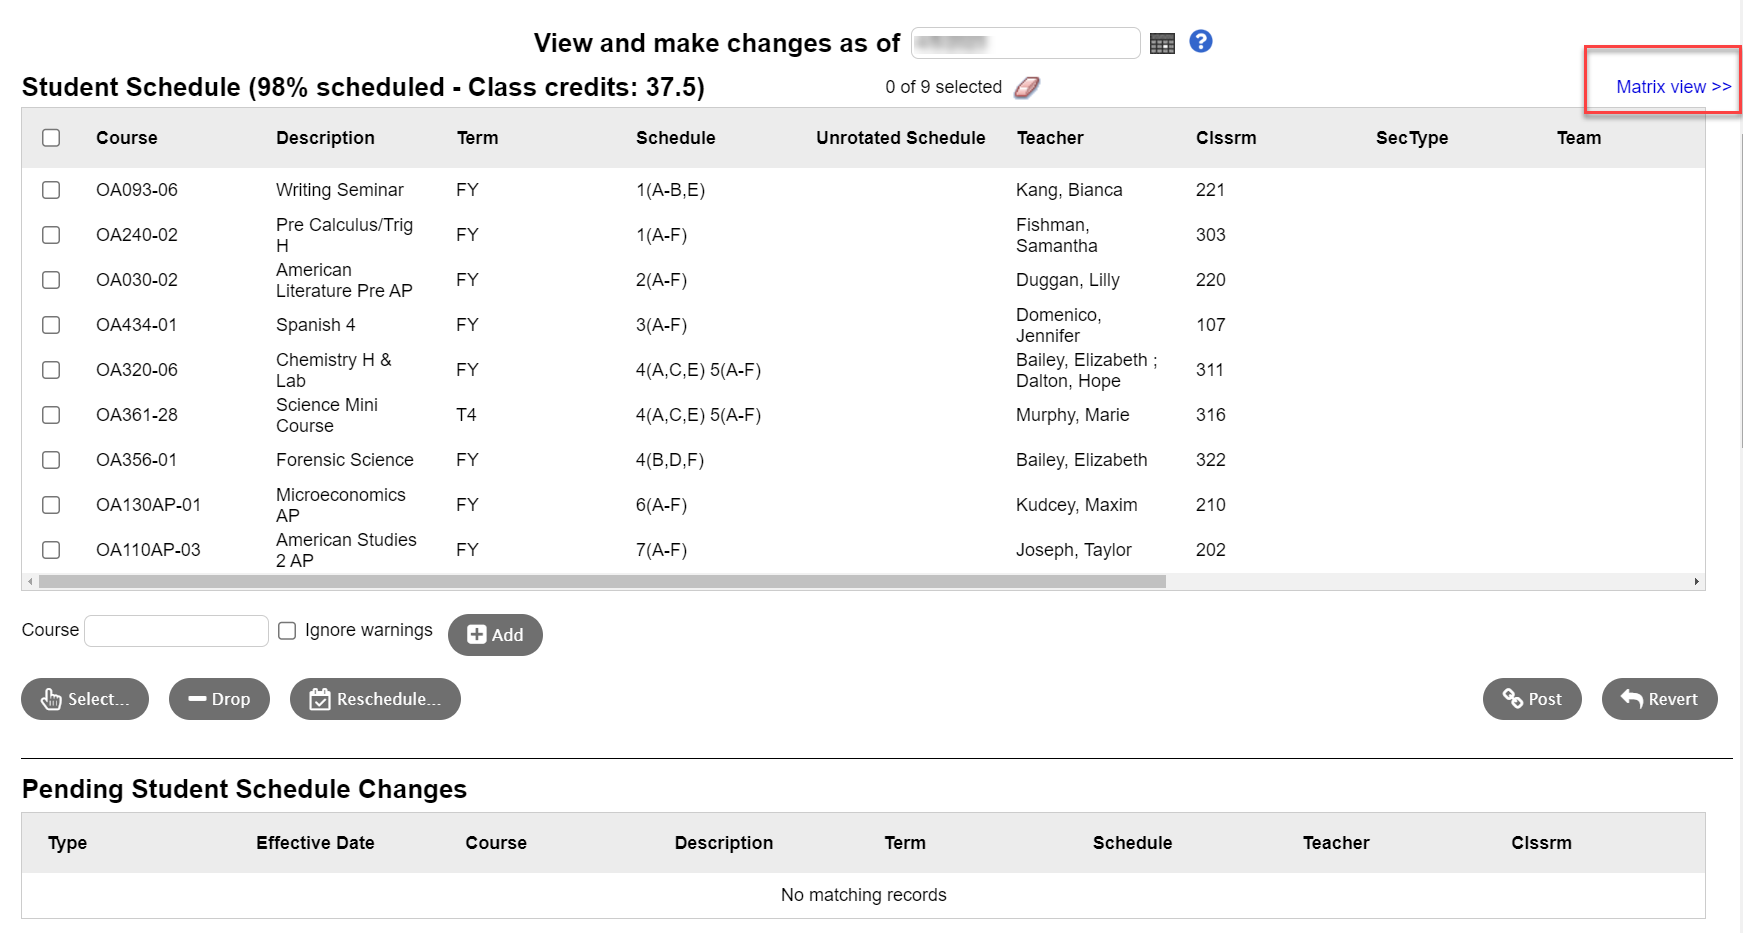
- Use the List view (when in List view, you will see Matrix view at top-right):
-
- Use the Matrix view (when in Matrix view, you will see List view at top right):
-

Click << List view or Matrix view >> to select the viewing format.
- Your school might allow you to make changes to a schedule effective for a past or future. The ability to make past and future scheduling changes is available in the School view only.
Notes:
If your school allows past and future schedule changes:
You will see Workspace Mode at the top of the page when in the School view.
And you want your schedule change to be effective on a past date, do not specify a future date on the Workspace page. When posting the change, you will be able to set the effective date to a past date when in the School view.
If your school allows future schedule changes, but does not allow past schedule changes, you will not see Workspace Mode at the top of the page. Instead you will see View and make changes as of at the top of the page when in the School view.
-
- To make the change effective today or on a past date, do one of the following:


-
- To make the change effective on a future date, do one of the following:
- If you see Workspace Mode at the top of the page, select Future. Use the date picker to select the future date when you want the change to take effect.
- If you see View and make changes as of at the top of the page, use the date picker to select the date you want the change to take effect.
Note: If you do not see Workspace Mode or View and make changes as of at the top of the page, your school does not allow future schedule changes. See your Aspen system administrator.
- After
you add the sections, click Post. If your school allows past-dated changes to the schedule, and you have not selected a future date on the Workspace page, the "All changes take effect on" date picker appears. Do nothing for the schedule change to take effect today, or click on
 to select a date in the past (within the school year) for the change to take effect on that date.
- The changes you made are now the
student’s active schedule. If the changes are for a future date, the schedule changes will be made automatically on that date.
Note: If you switch the student from one section to another section of the same course, or a course in the same department, and the student has a transcript record for the previous section, the "Update transcripts to new section" pop-up appears. To move any grades from the original section to the new section on the student’s transcript, select the Update checkbox.
When you add course sections to a student’s schedule, you can enter a specific course and section number, or the system can help you find a course section that is available during a certain period, or in a specific department.
In the School view, you can print a student’s schedule.
Also, the system can reschedule a student. When you click Reschedule, the system deletes the student’s schedule and attempts to schedule him or her in as many requested courses as possible. You can also update course requests.