Define District (Root Organization) Receipt Printing preferences
Define receipt printing preferences in the
-
Cashier's Office payments
-
Class attendance
-
Daily attendance
Staff can print receipts (passes to class) during office input of attendance.
To define attendance receipt printing preferences:
- Do one of the following:
- To define
- To define school receipt printing preferences: Log on to the School view. Click the School tab. On the Setup side-tab, click Preferences.
- Click the Category drop-down to select Receipt Printing. The Receipt Printing preferences page appears.
-
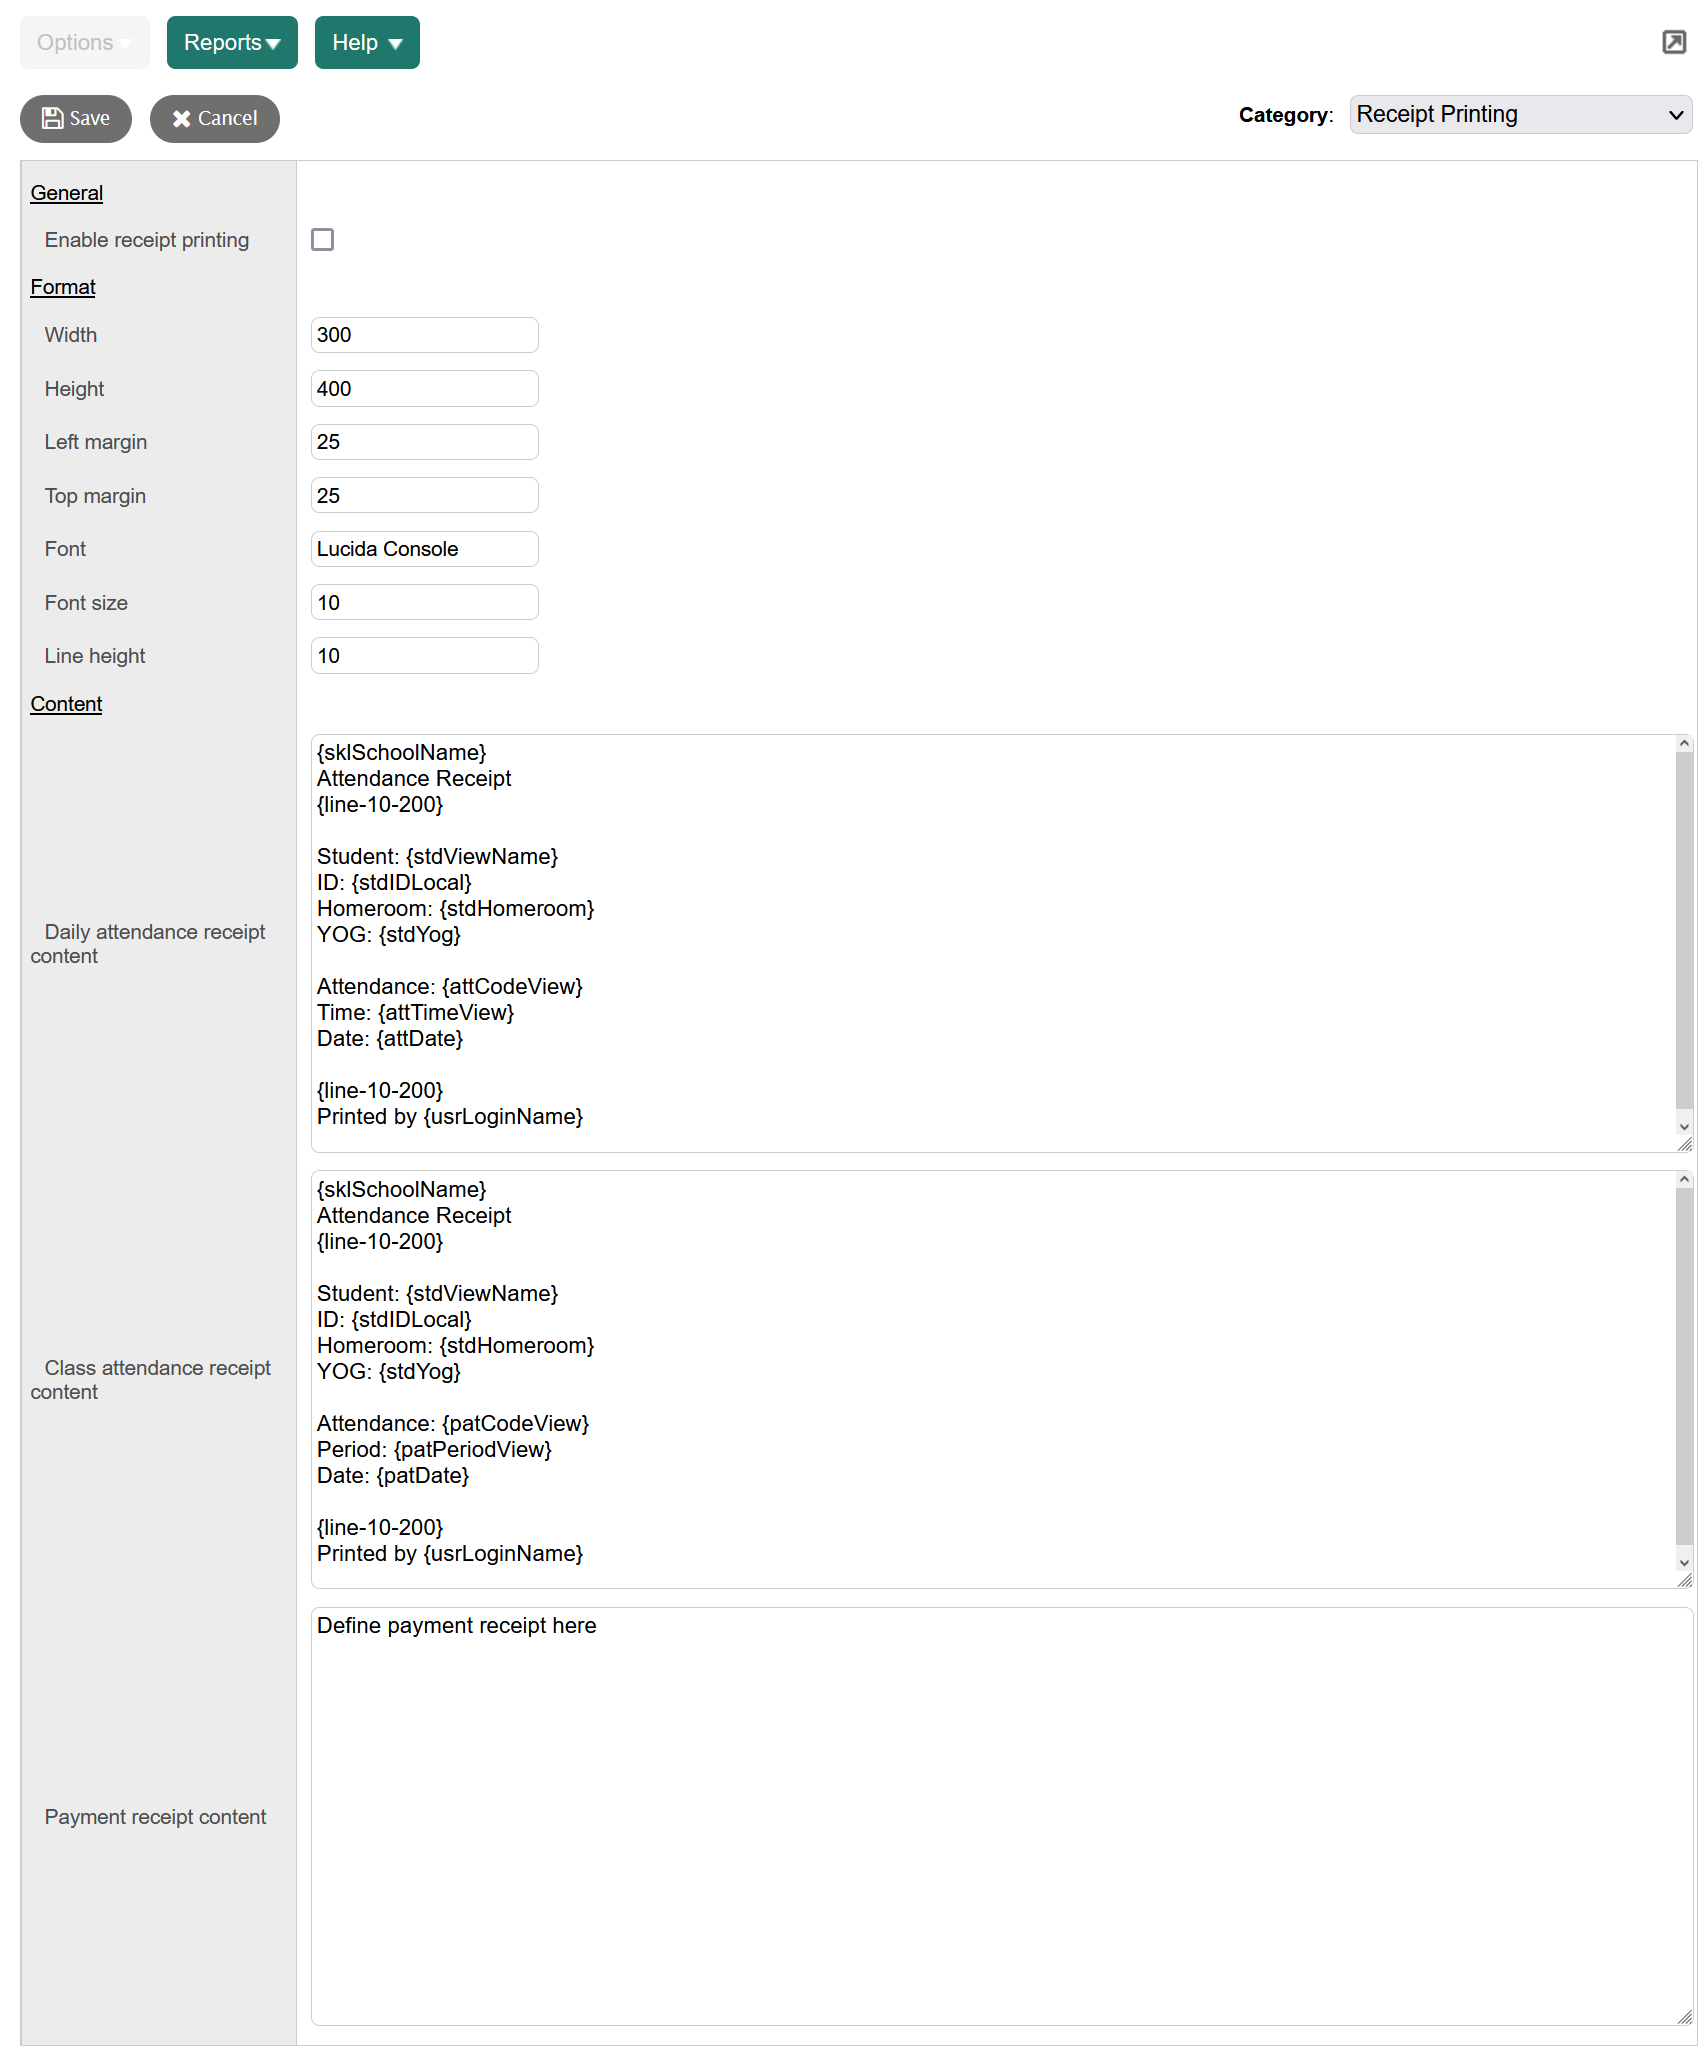
- Select the Enable receipt printing checkbox.
- Type your formatting preferences in the appropriate fields.
- In the Daily Attendance receipt content field, type the content of the pass that prints for daily attendance. Define the receipt content using a combination of literal text and field tokens. You can add tokens for any field in the School, Student, User, and Student Attendance tables. You can also add horizontal lines.
-
Here is an example:
Student: {stdViewName}
ID: {stdIDLocal}
Homeroom: {stdHomeroom}
YOG
 year of graduation:
{stdYog}
year of graduation:
{stdYog}
Attendance: {attCodeView}
Time: {attTimeView}
Date: {attDate}
{line-10-200}
Printed by {usrLoginName}
|
For example:
|
-
In the Class Attendance receipt content field, type the content of the pass that prints for class attendance. Define the receipt content using a combination of literal text and field tokens, as described in Step 5.
Here is an example:
{sklSchoolName}
Attendance Receipt
{line-10-200}
Student: {stdViewName}
ID: {stdIDLocal}
Homeroom: {stdHomeroom}
YOG: {stdYog}
Attendance: {patCodeView}
Period: {patPeriodView}
Date: {patDate}
Time: {patTimeOut}{patTimeIn}
{line-10-200}
Printed by {usrLoginName}
Level of the Grade
{stdGradeLevel}
- In the Payment receipt content field, type any details about an individual payment receipt.
- Click Save.
Notes:
- You will need to set up each workstation printing receipts.
- Each user printing receipts must go to the School view. On the settings bar, click Set Preferences. On the Receipts tab, select the Print Daily attendance receipts and/or Print Class attendance receipts checkboxes.
- Each user printing receipts must set the receipt printer as the default printer. In Windows, click Start > Devices and Printers. Right-click the receipt printer, and then select Set as Default Printer. A checkmark appears on the receipt printer icon to mark it as the default printer.
- To prevent the receipt from printing without confirmation from the user, deselect the Show preview checkbox.
- View the receipt output using the 'test' students in your database, if your district uses them.