You can enter attendance for students one at a time by
name,
Commonly, attendance staff members use the Daily Office Input side-tab to update attendance for students who arrive or are dismissed after daily attendance has been initially entered.
|
Example: A student arrives at school an hour after homeroom period. They are already absent in the system. The attendance manager types the student’s name and changes the original Absent code to Tardy. |
|
Notes:
|
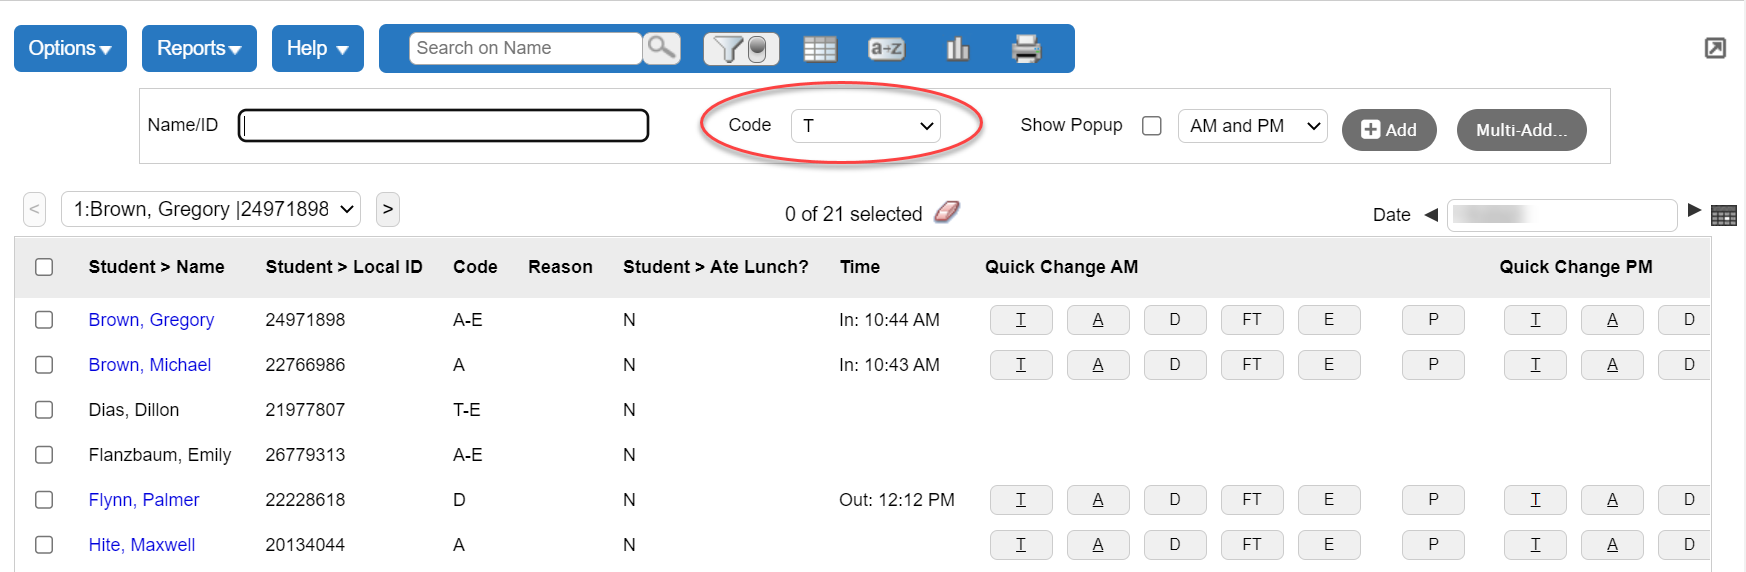
To enter attendance for one student at a time on the Daily Office Input side-tab:
- Log on to the School view.
- Select Attendance > Daily Office. The Daily Attendance Office Input page appears.
-
-
Do one of the following:
-
To enter the same attendance code for more than one student, select the appropriate code at the Code drop-down, and then click Add or press ENTER.
Example: If attendance has already been entered and you are preparing to enter students who arrive tardy to school, select the Tardy attendance code at the Code drop-down, and click in the Name/ID field. Then, when tardy students arrive, you only need to type their name and click Add or press ENTER. -
To enter an attendance code for a single student, use the Quick Change buttons in Step 5, instead of the Code drop-down.
-
- In the Name/ID field, do one of the following to select the record you want to update:
- Use your scanner to scan the barcode of the student from an input sheet.
- Type the student’s full or partial name, and then press Enter. If a direct match is found, Aspen highlights the student's name on the Input page. If more than one record meets the criteria, a pop-up displays a list of potential matches. Select the student, and then click OK. Aspen highlights the row with the selected student's name.
- Type the student’s ID, and press Enter.
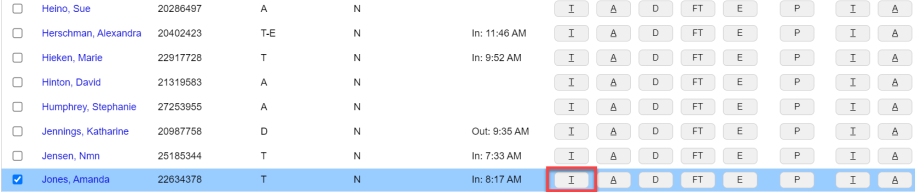
- Click the appropriate attendance code in the Quick Change column in the student's row.
Notes:
When a student's calendar is not in session, the student is grayed out, and the daily and class attendance codes appear as "Not in session." This helps prevent someone from mistakenly marking students absent who are in a homeroom but on a different calendar from the current day, such as kindergartners or seniors.
To quickly change an individual student’s record, click the appropriate code in the Quick Change column (or Quick Change AM and Quick Change PM columns, if your school takes second daily attendance), or click the student's name to edit the record. For example, if a student is marked absent during homeroom and then arrives later, you can change his record from A to T by clicking the Quick Change button.
If you click more than one code, or click the same code twice, verify that the correct values appear in the Code column.
Depending on how your Aspen system administrator creates attendance codes, the system either adds or replaces codes you click. For example, if you click A (absent), and then click T (tardy) to mark a student tardy and absent, the system either displays AT or only T in the Code column.
- If you need to enter more detailed information, select
the Show Popup checkbox to enter it on the Add Attendance pop-up
- To enter this attendance record for more than one date, click Multiple Dates. The Add Attendance pop-up now displays "Start date" and "End date" fields.
- Enter the date range. The system creates the attendance record for each date in the range.
- Enter any information required in the fields. A checkmark appears in the box of the attendance code you selected (Absent, Tardy, or Dismissed).
The Portion absent field displays the value associated with the attendance code. For example, 1.0 is associated with the Absent code. If needed, select a different value to indicate how much of the day the student missed.
At the Other codes and Reason fields, you can provide an explanation for the absence, such as field trip, college visit, or suspension. Type in any additional information in the Comment field
- At Arrivals & Departures, click Add to enter a specific time when the student entered or left school, and whether the absence was excused.
If your school takes second daily attendance, you must specify whether the attendance code you are entering applies to the student’s AM daily attendance record, PM daily attendance record, or both by entering information in the appropriate section(s) of the pop-up.
When the Attendance activity tracking preference is enabled by the
 , and then select a code to describe the absence. If you select Other, enter an Activity Comment to describe the reason. Click OK.
- Click Save to close the pop-up. The attendance records for the students you selected appear on the Daily Attendance Office Input page.
- If your school collects second daily attendance (as specified in its Daily Attendance preferences), a drop-down
 appears at the top of the page. Click the drop-down, and do one of the following:
- Select AM and PM if you want the attendance code you are entering to be applied to both the student’s AM and PM daily attendance records.
- Select AM if you want the attendance code you are entering to be applied only to the student’s AM daily attendance record.
- Select PM if you want the attendance code you are entering to be applied only to the student’s PM daily attendance record.
- Depending on your settings, a pop-up might let you print the student a pass to class.
|
Notes:
|