Using Special Education Workflows
For each step in the process, your administrator creates a workflow![]() a method of coordinating multi-step processes involving one or more users,
or a checklist of steps you must complete to enro
a method of coordinating multi-step processes involving one or more users,
or a checklist of steps you must complete to enro
When you enro
The workflow is represented by a checklist for the special education
team to complete. Students who are initially referred to the program do
not have an active IEP![]() Individualized Education Program
until you complete all steps outlined in the checklist. After you enro
Individualized Education Program
until you complete all steps outlined in the checklist. After you enro
Your special education system administrator defines and manages the workflows. All special education users use the workflows.
|
Note for Massachusetts
users: When you are in a Massachusetts Initial Referral, Re-evaluation,
or Review workflow, if you cannot select the Approved
or Rejected– Appeal to DOE |
To complete a special education workflow:
- Log on to the Special Education view.
- Click the IEP tab.
- Click the Workflows side-tab.
- Select the IEP to complete.
- Select the workflow you want to update, and click Checklist. The checklist for that workflow appears.
-
The system highlights the next step you are to complete.
- Click the blue text to enter the information to complete the step. For some steps, you might enter a date. For other steps, you might complete a form.
-
Note: If your
- Click the yellow Unlocked icon
 .
. - When the green Locked icon appears
 , you can edit the IEP.
 -
If the red Locked by another user icon
 appears, someone else has locked the IEP data for editing, and you must wait until they are done before you can make your changes. If you have override privileges, you can override the lock. If you do so, the following warning appears.
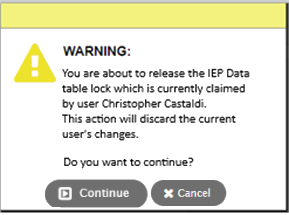
- When your changes are complete, click Save, and then click to release the lock.
-
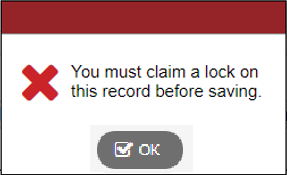
If a lock is overriden by someone else, the following prompt appears when you attempt to save.
Click the yellow Unlocked icon
to reclaim the lock, re-enter your edits and save your changes; then click to release the lock. - Click the yellow Unlocked icon
-
Note: Although you complete most steps in order, it is sometimes possible for steps to be completed nonconsecutively. Any step with text that appears in blue can be completed, even if it is not highlighted.
-
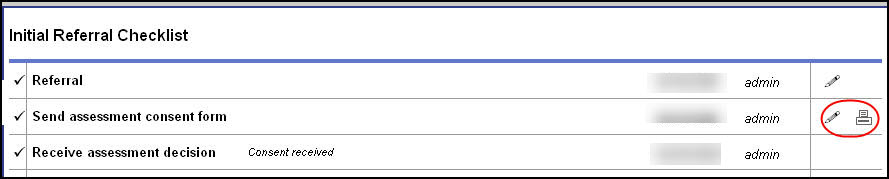
- For steps with multiple outcomes, after you click the step, you select the outcome. For example, if you click the Receive assessment decision step, you click either Consent received or Consent denied:
-
If you click Consent received, the next step in the process appears in blue. If you click Consent denied, all steps are grayed out and you cannot continue the referral process for this student. Their status becomes Ineligible.
- Some steps might require you to enter information. For example, assume the step is Define IEP Team. The system displays a series of pop-ups you use to select the people who are part of the student's IEP team.
- For other steps, a form appears. Fill out the form, and click Save.
- For some steps, there may be several forms to complete. Click the Available Forms drop-down at the top of the pop-up to complete additional forms.
|
Note: To print additional or blank copies of the forms, click the Forms side-tab. |
On the checklist, you can Edit ![]() or Print
or Print![]() the form:
the form:
|
Note: If you make a mistake, click the checkmark to re-enter or delete the information for a step. Uncheck appears below the step. Click Uncheck, and click OK to confirm. |
- After you complete some steps, a date in the Date Due column might appear:
These dates are determined by your
See Define Compliance Rules for Workflows.
If a warning threshold has been set up, ![]() warns you that there are only a few days before the step needs to be completed.
This warning disappears after the step is completed or the date due is
passed.
warns you that there are only a few days before the step needs to be completed.
This warning disappears after the step is completed or the date due is
passed.
If the date due has passed for a step, ![]() indicates that the IEP is out of compliance. You can continue to follow
the workflow, but the icon remains. Hover over the icon to display how
many days the step is overdue.
indicates that the IEP is out of compliance. You can continue to follow
the workflow, but the icon remains. Hover over the icon to display how
many days the step is overdue.
After you complete all steps in the checklist, the system implements the student’s new IEP.
|
Note: The system creates a draft IEP as soon as you initiate a workflow. Throughout the workflow process, the system continues to develop the IEP. The last step of the IEP signifies that the process is complete and the draft IEP is now implemented. At this time, the current active IEP, if any, is changed to Previous, and the draft IEP becomes Active. If a student is deemed not eligible to receive special education services on an Initial Referral workflow, the system changes the status of the draft IEP to Discarded. If a student is found no longer eligible on a Re-evaluation workflow, the system changes the status of the active IEP to Previous and the status of the draft IEP to Discarded. |