Enable or disable lesson sharing in the Planner
When you add a quick lesson plan to the Planner, you can choose to share the lesson with other teachers of the same course or make the lesson private. When a lesson plan is private, it does not appear in My Resources for any other teacher.
| Note: Lesson sharing is disabled by default. Teachers who want to share their lesson plans must enable this feature. |
To enable lesson sharing:
- Log on to the Staff view.
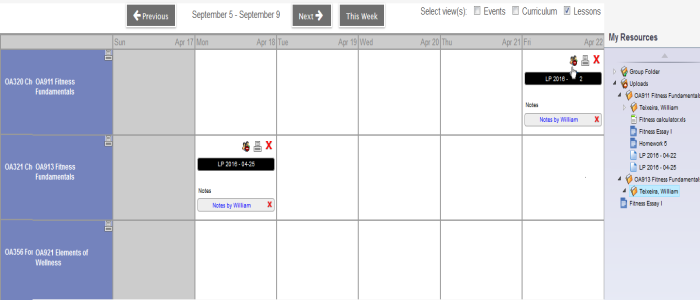
- Click the Planner tab. Your Planner appears.
- In the upper-right corner of the screen, select the Lessons view. Your lessons appear.
-
- See Create Lesson Plans Separate from a Curriculum Map for more information on adding lesson plans.
- To make a quick lesson plan shared, do one of the following:
- On the quick lesson plan displayed in the Planner, click the
 icon to toggle the lesson plan to "shared." When the quick lesson plan is shared, the
  icon appears.
Note: To change a lesson plan back to private, click the
icon again. When a quick lesson plan is private, the icon appears.
- In My Resources, add or edit a quick lesson plan. The details pop-up appears.
-
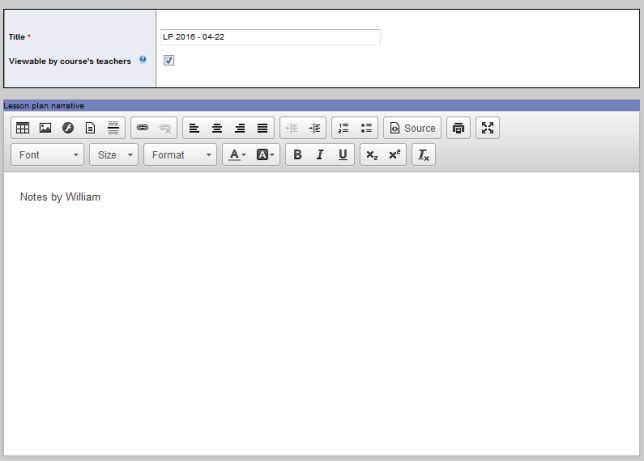
- Select the Viewable by course's teachers checkbox.
- Click Save.
When a quick lesson plan is shared, it appears in My Resources for all teachers who teach that course. The quick lesson plan appears in Uploads > Course # > Teacher's name folder (the teacher who created the lesson).
To open a shared quick lesson plan in another teacher's folder:
Do one of the following:
- Double-click the quick lesson plan name.
- Select the quick lesson plan, and then click Edit.
The lesson plan details appear as read-only.
| Note: The lesson plan must be in the course's folder, under the teacher's sub-folder, before other teachers can view it. |
To create your own editable copy of a quick lesson plan shared by another teacher:
- Log on to the Staff view.
- Click the Planner tab, and then select the Lessons checkbox.
- Drag and drop the lesson plan from My Resources > Uploads > Course # > Teacher's name folder (the teacher who created the lesson) onto the Planner. An editable copy of the quick lesson plan is created in My Resources > Uploads > Course # > Teacher's name folder (your name).
-
Notes:
- You can only edit one component of the quick lesson plan at a time from the Planner. Use My Resources to edit the entire quick lesson plan.
- Sharing is disabled by default in the newly-created copy of the lesson plan. Enable sharing by clicking the icon on the quick lesson displayed in the Planner, or by editing the newly-created copy of the quick lesson plan in My Resources > Uploads > Course # > Teacher's name folder (your name).