Create lesson plans separate from a curriculum map (Quick Lesson Plans)
Use the Lessons view on your Planner in Aspen IMS as your online planbook. You can store all information you need to
- Notes
- Resources (document files, weblinks, etc.)
- Standards
You might use the Lessons view for the following reasons:
- Your
- Your
The Lessons view might be a great page to display on your classroom's projector or interactive whiteboard as the home base for each class meeting. Tap or click your Notes to introduce the day's activities, and then tap or click your Resources to guide students through a handout, or access and show a video that will kick off the day's discussion.
To use the Lessons view on the Planner tab:
- Click the Planner tab, and then select the Lessons checkbox.
-
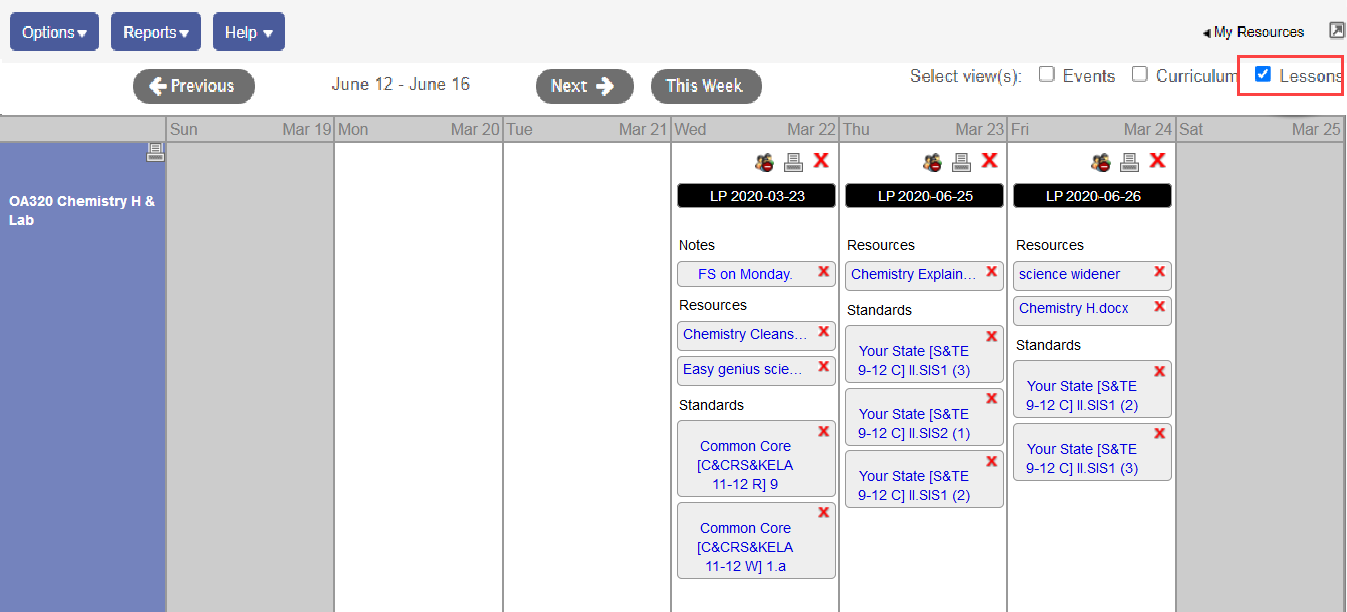
- For the current week, the grid displays a box for each day.
- Click inside a box to do any of the following for a class for a specific day.
-
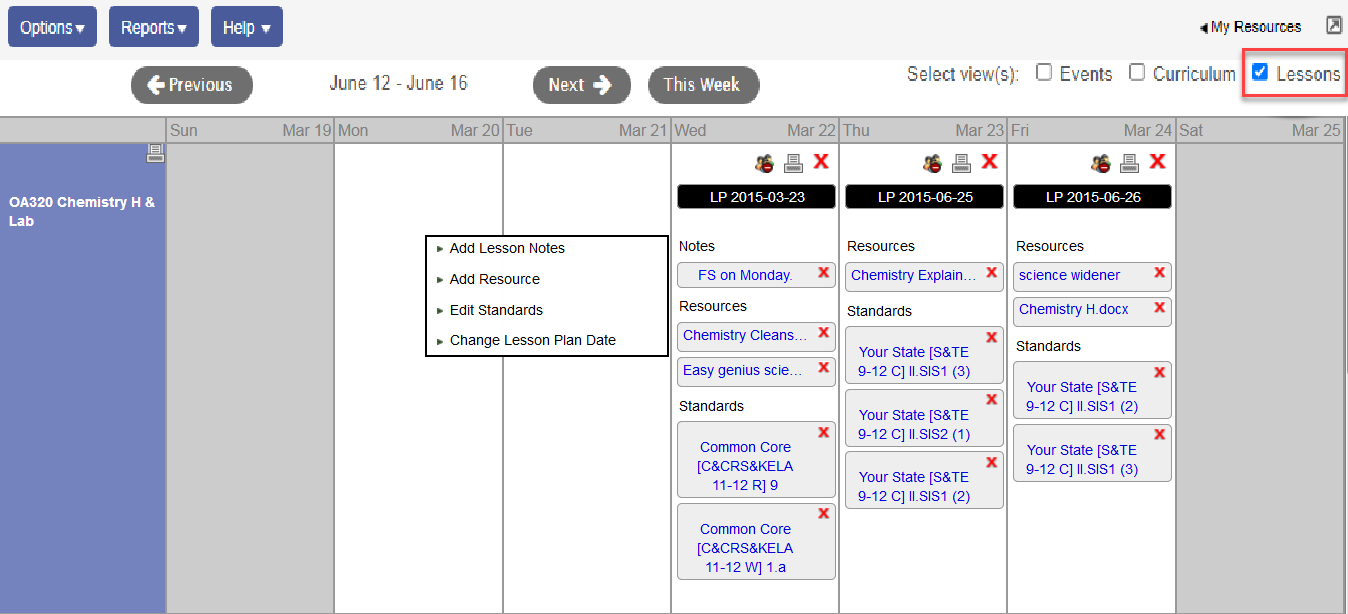
- Add Lesson Notes: A text editor appears. You can include links and images. Click Save to save your notes.
- Add Resources: My Resources appears. Drag and drop files to or from your resources.
- Add Standards: The standards pick list appears. Search for and select the standards this lesson plan addresses.
- Change Lesson Plan Date: Type or click
 to select the new date, and then click OK. Aspen moves all notes, resources, and standards from the current date to the new date.
Note: Click  next to the course name to print lesson plan notes, including a list of attached resources and standards for the class for that week. Click in the date box to print the lesson plan notes for the class on that date.
- Aspen automatically creates and saves a lesson plan to your Uploads folder, course sub-folder, and a sub sub-folder with your name in My Resources. Aspen names quick lesson plans "LP", followed by the date you created them for. You can rename and move quick lesson plans into different folders.
You can also copy a quick lesson plan and make changes to use it for a different day. Or, make a quick lesson plan that contains slightly different content for a similar course.
If another teacher associated with the course shares his/her quick lesson plans, a folder appears in the My Resources' Uploads folder with that teacher’s name. You can drag and drop their quick lesson plans to your Planner and edit them. Likewise, they can use your quick lesson plans if you choose to share them. See "Enable or Disable Lesson Sharing in the Planner" for more information.
Note: When you drag and drop a quick lesson plan created by another teacher, it creates a copy in your Uploads folder and does not affect the other teacher’s information.
- Do any of the following:
- To add a quick lesson plan you already created to a specific date, drag it from My Resources to the date on the Lessons view.
- If a quick lesson plan spans multiple days, you can add it to more than one date. If you make any changes to the quick lesson plan and it is on your calendar more than one day, Aspen applies the changes to all instances of the plan.
- To delete a file associated with a lesson plan, click X next to the resource. This does not delete the file from My Resources.