Modify List
Use the Modify List option to quickly and easily edit text on a list page for any field that is editable. This is especially useful when you need to change values for multiple records.
|
Note: If you need to change a particular value to the same value for a large number of records, consider performing a mass update. |
To use the Modify List option:
- Go to any list page, such as the Student List.
- From the Options
menu, click Modify List. A
Pencil
 appears below the names of fields that can be edited.
-
Note: When Modify List is active (you see the Pencil icons), you cannot sort the data on the screen. You will need to turn Modify List off, sort, and then turn it back on.
- Click
in the column containing the text you want to edit. Two new icons
replace the pencil in the selected column.
- Based on the type of field you are editing, do one of the following:
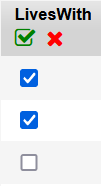
- Select a checkbox to change its value to "yes," or deselect it to change its value to "no".
- Use the drop-down to select the desired value.
- Type a value in the blank field.
- Repeat Step 4 for as many records as you need to modify.
- When you have finished making your modifications, at the top of the column:
- Click
 to save all of your changes. If
you don't do this before moving to a new page, all of your changes
will be lost.
to save all of your changes. If
you don't do this before moving to a new page, all of your changes
will be lost. - Click
 to discard all of your changes and leave the values in the column
as they were.
to discard all of your changes and leave the values in the column
as they were.
|
Note: When the Attendance activity preference is enabled by the |