Define report details
To create a new report or modify an existing one, go to the report's details. To give users access to reports via the Published Reports widget, see Setting Up Published Reports.
| Note: While logged on to the |
To create or edit a report:
Important: Some reports are marked within Aspen as system-owned. Editing the source code, format definitions, or input definitions will result in the following warning: |
- Log on to the
- Select Tools > Reports.
- Do one of the following:
- To edit an existing report, click the report you want to modify.
- To create a new report, select Options> Add.
The report details page appears.
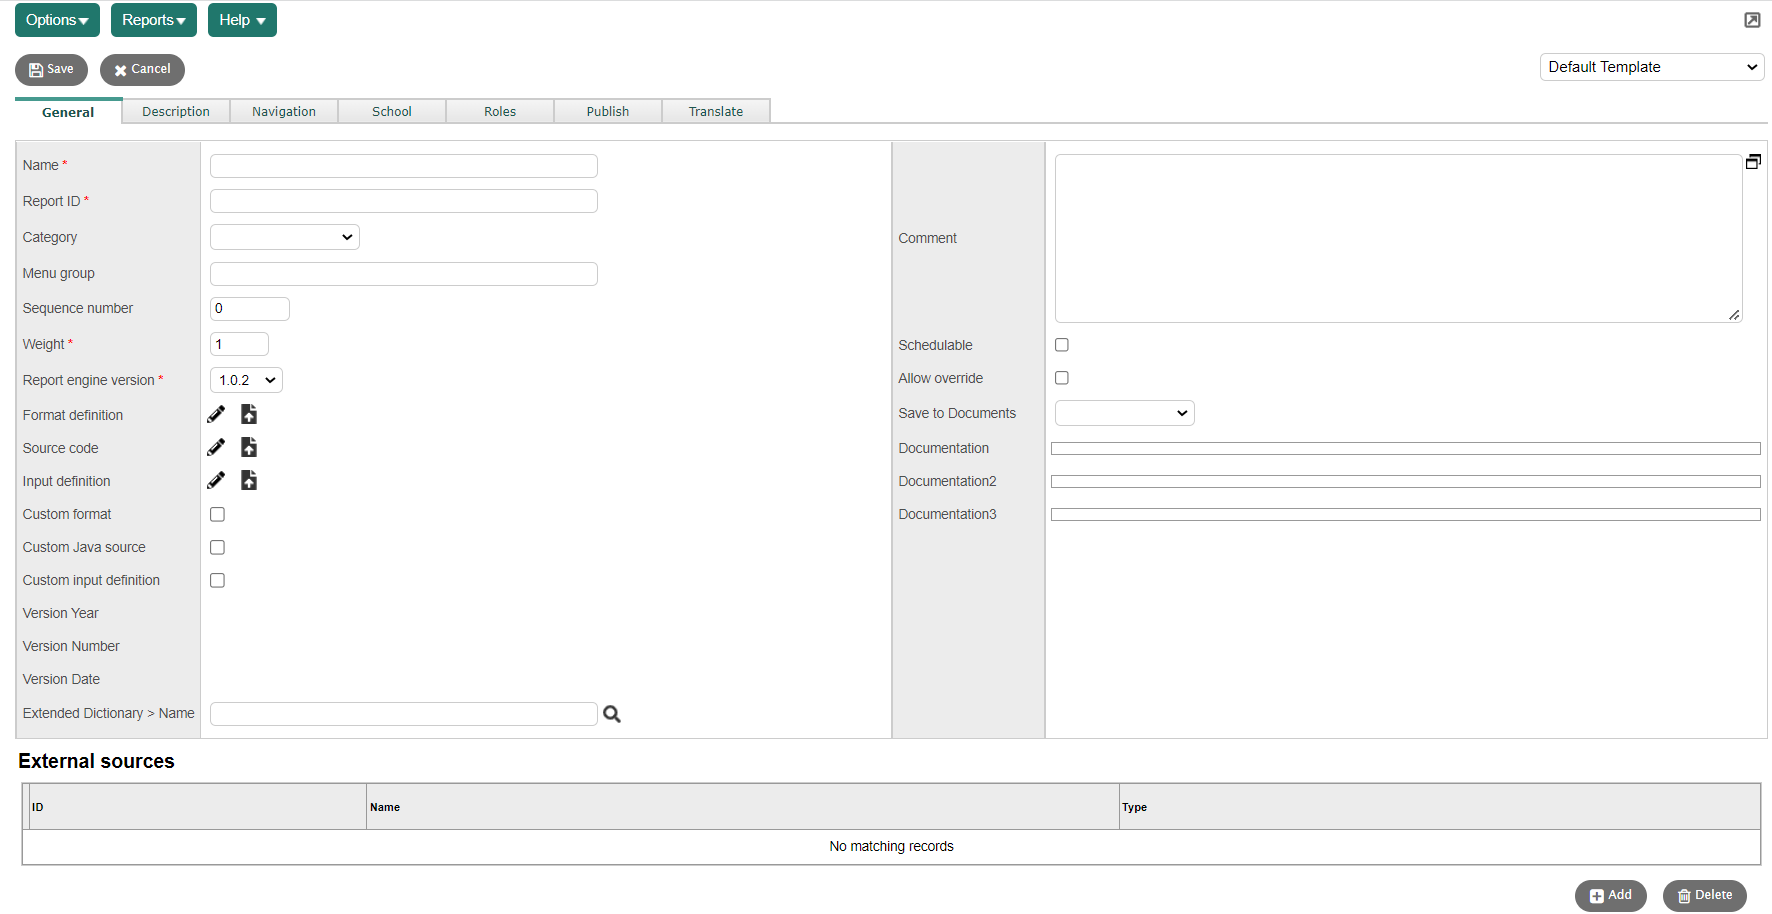
- Use this
table to enter information in the fields on the General
sub-tab:
Note: Some fields are available only in the
-
Field
Description
Name
Type a name that distinguishes the report.
Report ID
Type an identifying number or code for the report.
Parent Report > Name
(Available only in the
Click
 to select the
 Note: You can only customize reports that your Category
Click this drop-down to select the appropriate category for the report.
Menu group
Type the name of the Reports sub-menu the report will appear in, such as Student Lists.
Sequence Number
Type a number to indicate the report's placement on the Reports menu.
Weight
Type a number to indicate the report’s priority when running multiple reports simultaneously.
The report engine version determines which version of iReport
 free, open-source software which can be used to customize Aspen reports must be used
to modify the report:
free, open-source software which can be used to customize Aspen reports must be used
to modify the report:Report engine version
iReport version
1.0.2
2.0.4
3.0.1
3.00
Format definition
Do one of the following:
- Click
 to edit the report format in XML eXtensible Markup Language.
 - Click
 to upload an XML report format.
 - For an existing
report, click
 to download
the XML report format.
to download
the XML report format.
Source code
(Available only in the
Do one of the following:
- Click
to edit the report's Java source.
- Click
to upload the report's Java source.
- For an existing
report, click to download
the report's Java source.
Input definition
(Available only in the
Do one of the following:
- Click
to edit the report's input definition.
- Click
 to upload the report's input definition.
 - For an existing report, click
 to download the report's input definition.
Custom format
Select this checkbox to indicate the report's format has been customized.
Note: If you modify the default version of a report rather than making a copy, you must select this checkbox or your customizations might be overwritten during an update. Custom Java source
(Available only in the
Select this checkbox to indicate the report's Java source has been customized.
Note: If you modify the default version of a report rather than making a copy, you must select this checkbox or your customizations might be overwritten during an update. Custom input definition
Select this checkbox to indicate the report's input definition has been customized.
Note: If you modify the default version of a report rather than making a copy, you must select this checkbox or your customizations might be overwritten during an update. Extended Dictionary > Name
(Available only in the
The original report’s extended dictionary should be the same for the modified report. Generally, this field will be blank.
Comment
Type a description of the modifications you are making to the report, for documentation purposes.
Schedulable
Select this checkbox to permit this report to be run on a schedule.
Allow override
(Available only in the
Select this checkbox to permit this report to be customized at the
Save to Documents
This field allows some student- and staff-related reports to be saved and accessed from the Documents side-tab.
Select either:
-
Save by Default to automatically save the report to the Documents side-tab after it runs.
-
Save on Demand to indicate when you run the report whether to save it to the Documents side-tab.
By selecting either option, the Save to Documents field will appear on the pop-up when you run the report. (The field is already enabled if you select Save by Default.)
Note: Although this field appears for every report, only those that use a report data grid can be saved to the Documents side-tab. If you try to save a different type of report, an error message appears. Go to the Tool Log to view details (District [Root Organization] view, Admin > Logs > Tool Log). - Click
- If logged on to the
- Beneath the "External sources" table, click Add. The Tool Selection pop-up appears.
- Select a tool type from the Select a tool type drop-down. The pick list refreshes to display all tools of this type currently defined in the system as owned by the organization whose view you are logged on to.
- Select the tool(s) you want to use as external sources of code for the report.
- Click OK.
- Click Save.
- To define the locations, including NavID and views, at which users can run the report from the Reports menu, click the Navigation sub-tab.
- To add a new location at which users can run the report from the Reports menu:
- Click Add.
- In the NavID field, type the NavID (location name). See Find the NavID (Location Name) for an Aspen Screen.
- Select the checkboxes for the views where the report appears.
- Click OK.
- Click Save.
- To change the views at which users can run the report from the Reports menu:
- Click the NavID.
- Select or deselect the checkboxes for the views to be changed.
- Click OK.
- Click Save.
- To delete a location at which users can run the report from the Reports menu:
- Select the checkbox for the NavID.
- Click Delete.
- Click Save.
- To
define which districts
- To give or deny specified units the ability to run the report in the Reports menu:
- Click the Visibility type drop-down, and do one of the following:
- To deny a unit the ability to run the report in the Reports menu: Select Exclude.
- To give a unit the ability to run the report in the Reports menu: Select Include.
- Click Add.
- Click the Owner type drop-down and select the type of unit to which you want to give or deny the ability to run the report from the Reports menu. The pick list refreshes to display all units of that type currently defined in the system as owned by the organization whose view you are logged on to.
- Select the district(s)
- Click OK.
- Click Save.
- To define which user roles can run the report from the Reports menu, click the Roles sub-tab.
- To give or deny specified user roles the ability to run the report from the Reports menu:
- Click the
Role visibility type drop-down,
and do one of the following:
- To deny a specific user role the ability to run the report from the Reports menu: Select Exclude.
- To give a specific user role the ability to run the report from the Reports menu: Select Include.
- Click Multi-Add...
- Select the desired user role(s) from the User Role Pick List.
- Click OK.
- Click Save.
- To customize the publication of the report, click the Publish sub-tab:
- Customize the default subject and message, if desired, and click Save.
- Confirm
the report is listed on the intended Reports
menu.
For example, if you added a report to the Reports menu from the Student List:
- Log on to the School view.
- Click the Student tab.
- Click the Reports menu.
- Check the Reports menu in each view defined on the Navigation sub-tab. Some reports are designed to run only in a particular view.