On any student list page, click the Quick Letter icon ![]() to access the following options:
to access the following options:
- Create Quick Letter: Brings up the Quick Letter wizard, which lets you customize your Quick Letter in detail and access saved letters.
- Attendance: Brings up a streamlined version of the Quick Letter wizard that begins on the input page for an attendance-related letter.
| Note: You can access the student list page by clicking the Student tab while logged on to the |
To create a Quick Letter:
On any student list page, click ![]() and select Create Quick Letter. The six-step Quick Letter wizard appears.
and select Create Quick Letter. The six-step Quick Letter wizard appears.
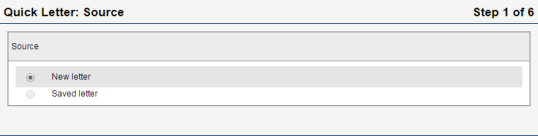
Step 1: Source
Do one of the following:
- New letter: Select this option to create a Quick Letter from scratch. Then click Next.
- Saved letter: Select this option to either resend a saved Quick Letter or use it as the basis for a new letter. A table of saved Quick Letters appears. Select the letter you want to re-create or use as a basis for a new letter. Then either click Next to skip to Step 3 and customize your letter, or click Finish to re-create the letter without any changes.
Step 2: Letter Type
![]()
- Click the Letter Type drop-down to select the type of Quick Letter you want to create:
- Quick Letter – Attendance: Creates a letter for students who meet certain attendance criteria, such as having four or more absences in the past month.
- Quick Letter –
- Quick Letter –
- Click Next.
Step 3: Input
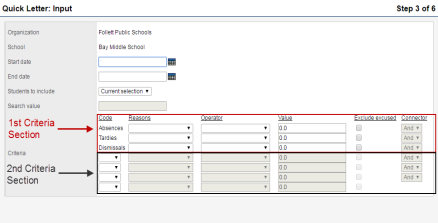
- Use the table to enter information in the fields:
Note: Some fields appear only for attendance,
-
Field
Description
Start date
(Attendance and
Type the start date of the date range you want to search for attendance records or
 and select it from the pop-up.
End date
(Attendance and
Type the end date of the date range you want to search for attendance records or
and select it from the pop-up.Transcript Definition
(
Click
 . The Transcript Definition Pick List appears. Select the transcript definition used by the school that the students you want to create a Quick Letter for attend. The fields of this transcript definition become the criteria that you can choose from when determining which students to create the letter for. Click OK.
Students to include
To further limit the set of students who meet your Quick Letter’s criteria, select one of the following options:
- Current selection: Only includes students within the current filter on the student list page.
- YOG: Only includes students who have a specific year of graduation. You can specify the YOG at the “Search value” field.
- Snapshot: Only includes students who are part of a specific saved snapshot. You can specify the snapshot at the “Search value” field.
Search value
If you selected YOG or Snapshot at the “Students to include” field, type the specific YOG or snapshot name you want to restrict your search to.
Criteria
- The 1st criteria section includes a selection of preset, common attendance codes (for attendance-related letters) or
- The 2nd criteria section lets you select other attendance codes or additional instances of
Note: Code
(Attendance letters only)
To include other attendance codes in your criteria than those listed by default in the 1st criteria section — Absences, Tardies, and Dismissals — select those codes from the drop-downs in the 2nd criteria section.
Type
(
To include more instances of the
For example, you might want to create a Quick Letter for students who have either more than one suspension or more than four detentions in a date range. In this case, you would need to have two Incidents rows, one for suspensions and one for detentions.
Fields
(
Click the drop-downs to select the transcript definition fields you want to use as criteria.
Reasons
(Attendance letters only)
To restrict your criteria to include only students who have an attendance code paired with a specific reason, select the reason from the drop-down.
For example, to create a Quick Letter for students who had absences due to illness, in the Absences row, select Sick (or another value) from the Reasons drop-down.
To restrict your criteria to include only students with a specific type of
Operator
To restrict your criteria to include only students with a certain number or range of attendance codes,
For example, to create a Quick Letter for students who had one or more suspensions in a date range, you would select Greater than or equal to as an operator and type 1 in the Value field.
Note: If you leave the Operator and Value fields blank, the letter’s criteria will include all students who have any value in their student record for the attendance code,
For example, say you want to create a generic letter to all students detailing the school’s attendance policy. You could create an attendance-related Quick Letter, and leave the Operator and Value fields blank in the Absences, Tardies, and Dismissals rows. This would include students who have any value, including none, for those fields in their attendance records.
Value
If you selected an operator to restrict your criteria to include only students with a certain number or range of attendance codes,
Exclude excused
(Attendance letters only)
Select this checkbox to exclude from your criteria any instances of that row’s attendance code that were excused by a teacher or staff member.
Connector
To include multiple criteria, select one of the following connector options from the drop-down:
- And: Searches for students who satisfy both the criterion defined in that row and the criterion defined in the next row.
- Or: Searches for students who satisfy either the criterion defined in that row or the next row.
- Do one of the following:
- Click Next to customize the header for your Quick Letter.
- Click Finish to create the letter using the default or saved header, body text, and options settings.
Step 4: Create Header
Customize the header that appears on your letter using a modified version of Aspen’s rich text editor. For instructions on using the additional tools included in the modified editor, see Step 5 .
When creating a letter, certain information appears in the header by default. Your
- Make your modifications using the rich text editor.
Note: Click here for information on using Aspen’s rich text editor.
- Do one of the following:
- Click Next to customize your Quick Letter’s body text.
- Click Finish to create the letter using the default or saved body text and options settings.
Step 5: Create Letter
- Type the body text for your Quick Letter using a modified version of Aspen’s rich text editor.
-
In addition to the standard text and media editing tools, the modified rich text editor provides three additional tools designed for Quick Letters. Use the following table as a reference for using these tools:
Text Editor Tool
Function

Field: Use this tool to insert a field, such as “Student name,” into the text box. When you complete the Quick Letter wizard, this field is populated with the appropriate information for each student.
To insert a field in your Quick Letter, click the icon. The Add Field pop-up appears.
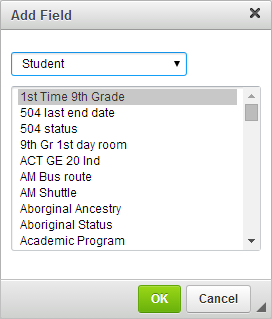
Click the drop-down to select the appropriate table for your field. For instance, if you want to add a field for the student’s State/Province, you would select the Physical Address table. The pick list refreshes to display all fields in that table. Select the appropriate field, and click OK.
Note: Table and field names are determined by your Aspen system administrator, and might differ from those shown. 
Expression: Use this tool to insert an expression into the text box. Expressions are variables that call and display information from the student record of each student included in the letter’s criteria. They can also be modified by filters that alter their output.
For example, you could use this tool to insert an expression in your letter’s body text that displays a pronoun (“He” or “She”) based on the gender code in the student record.
To insert an expression in your Quick Letter, click the icon. The Add Expression pop-up appears.
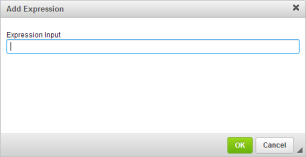
Type the expression in the Expression Input field, and click OK.
Note: The expressions that you can insert using the Expression tool are the same as the variables used in 
Calculation: Use this tool to insert a predetermined calculation, such as the student’s total number of suspensions, into the text box. When you complete the Quick Letter wizard, Aspen evaluates this calculation for each student included in the letter’s criteria.
To insert a calculation into your Quick Letter, click the icon. The Add Calculation pop-up appears.
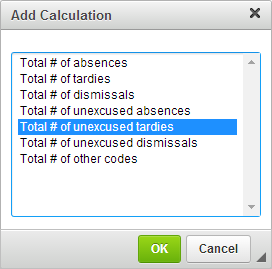
Select the appropriate calculation from the pick list, and click OK.
Note: The calculations available to you in the Add Calculation pop-up depend on the type of Quick Letter you are creating.
- When you are finished customizing your Quick Letter’s body text, do one of the following:
- Click Next to adjust the letter’s options.
- Click Finish to create the letter using the default or saved options settings.
Step 6: Options
- In the Options section, select one of the following:
- Don’t save: Aspen does not save the letter. This is the default setting.
- Save: Aspen saves the letter using previously-provided name and owner information. This option is only available when customizing a previously-saved Quick Letter.
- Save as: Aspen saves the letter using the name and owner information you provide in Step 2.
- If you selected “Save as”, use the following table to fill in the letter’s name and owner information:
-
Field
Description
Name
Type a file name for the letter.
Owner
Type
Click this drop-down to select one of the following, depending on your user privileges:
- User: Gives a user or yourself access to the letter.
- School: Gives users at a school access to the letter.
- Intermediate Organization: Gives all users in
- District: Gives all users in the
Name
Click
 . A pop-up lists the organizations or users you selected in the Type field that you have access to. Select a specific owner for the letter, and click OK.
- Click Finish. The letter appears.