Define your Planner settings
Define your Planner settings to determine how your classes appear on your Planner.
|
Note: Changes to the Planner settings will affect the appearance of the Planner widget. |
To define your Planner settings:
- Click the Planner tab.
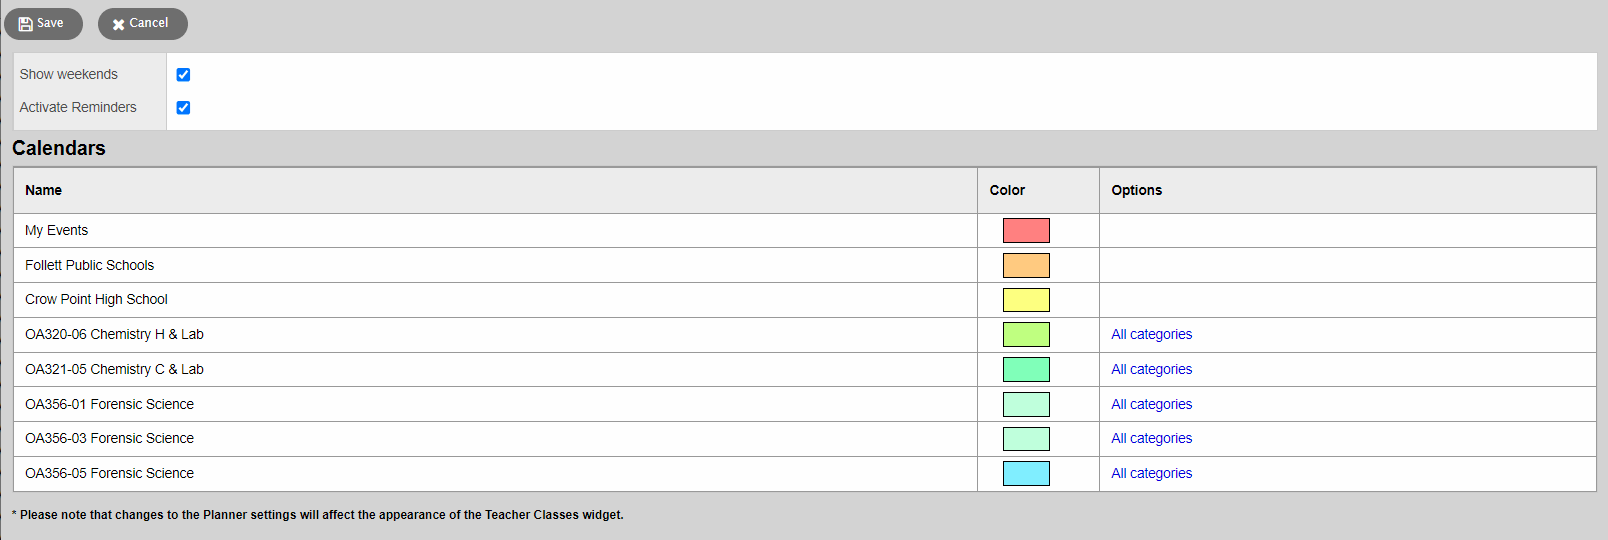
- On the Options menu, click Planner Settings. The Settings page appears:
-

- Use the following table to define your Planner settings:
-
Field Description Show Weekends
Select this checkbox if you want to see Saturdays and Sundays on your planner.
Activate Reminders
Select this checkbox if you want to display a single line reminder for each date within the date range of an assignment (date assigned through date due). The reminder line is a lighter color on the days the assignment is not due, and darker for the date the assignment is due.
For example, if the date due is three days after the date assigned, a reminder line appears on the calendar for all three days.
Note: If you select this checkbox and you view information for all of your sections on your Planner, your Planner could contain many assignment reminder lines for each date. This function is primarily intended for students to remind them that they are supposed to be working on something.
Color
Determine the highlighter colors that represent your sections and appointments on your Planner.
In the Color column, click the color box next to the item. The Color Chooser appears. Click a color, and click OK.
Within each class section, you can click All Categories to open the Category pick list. Select only the assignment categories you want to appear in the color you selected for the class.
Note: The colors for appointments is set by the My Events color.
- Click Save.
