You can enter several course requests![]() courses that students have requested to attend for the next school term
for a student using the Options
menu.
courses that students have requested to attend for the next school term
for a student using the Options
menu.
For example, your students might submit request sheets to the guidance office, who enters requests into Aspen.
To enter a student’s requests:
- Log on to the School
or Build view.
Note: In the Staff view, you can only view a student's requests.
- Do one of the following:
- If you are entering the student's requests for next year, go to the Build view, and click the Student tab. Then, click the Requests side-tab.
- If you are entering
requests for a student for the current year or next year, click the
Student tab. Click the Schedule side-tab. To enter requests
for the current year, click Requests
or Workspace. To enter next
year’s requests, click Requests,
and be sure to click the Filter
icon
 , and select Build
Year.
, and select Build
Year.Note: If you select the Build Year filter  a set of criteria to selectively screen out incoming information, such as "all active students" or "former students",
courses for the student's current school and year appear in the School
Course pick list. To enter requests for students for next year, especially
if they are attending a new school, use the Build view.
a set of criteria to selectively screen out incoming information, such as "all active students" or "former students",
courses for the student's current school and year appear in the School
Course pick list. To enter requests for students for next year, especially
if they are attending a new school, use the Build view.
- Select a student, and click the Requests side-tab. The requests page for that student appears.
- Do one of the following:
- Click Select on the page.
- Select Options > Add. The School Course Pick List appears.
-
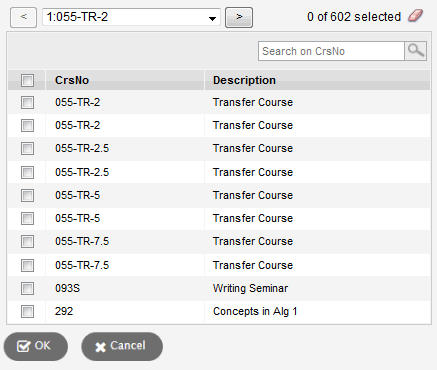
Tip: Press CTRL+F, and type a specific course number to jump directly to that course, instead of moving through the pages of courses.
- Also, note that if a student is associated with more than one school on the Schools side-tab for the build year, select the school you want to request courses from at the top of the School Course Pick List. If you select the student’s primary school, you can enter the student’s requests for courses at both his or her primary and secondary schools. Alternatively, if you log on to the student’s secondary school, you can only enter requests for courses at the secondary school. The School Name column displays which school a request is entered for.
- To filter the list of courses, select a specific department at the Department drop-down.
- Select the checkboxes
next to each course the student is requesting. You can click Next
 and Previous
  to move
from page to page to select many courses.
to move
from page to page to select many courses. - Click OK. The system adds all of the courses to the list of the student’s course requests.
- Click the course number of any of the requests to define if the request is an alternate, or to identify alternate requests if the student does not get into that course. You can also identify a specific section type this student needs for a course, such as Bilingual.
-
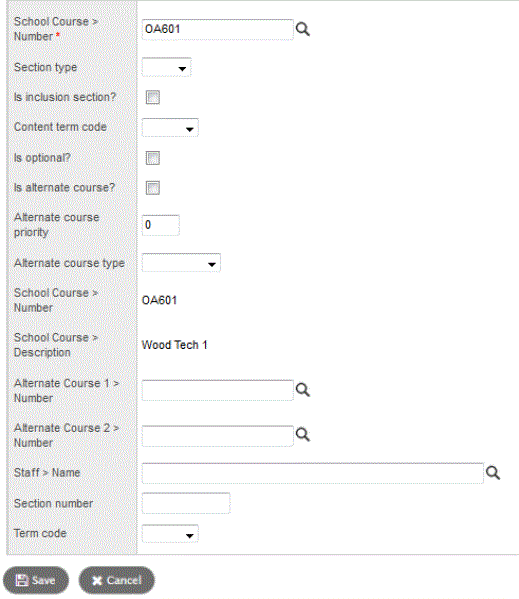
Note: At the Alternate course type field, you can determine how the system should handle this request. By default, all alternate requests are Substitute; the system uses them to replace students’ primary requests when students cannot be scheduled into them. Or, select Auto-fill for the scheduler to use the alternate request to fill in any holes that are not occupied by primary requests in the student schedule.
The student’s request percentage appears at the top of the page. Use this percentage to determine if the student has requested too few or too many courses.