You need to ensure that the appropriate students are available for scheduling at the appropriate schools. For example, the high school will need to include this year’s eighth graders in its schedule.
To associate students to their next year schools, you need to do the following:
To include the Next School field on the Student List:
Your Student List does not automatically contain the Next School field. Add the Next School field to your field set so that you can easily mass update the value for students by year of graduation.
Most school users
do not have access to edit the default field set![]() a custom selection of columns that appears on list pages,
so you might have to create your own.
a custom selection of columns that appears on list pages,
so you might have to create your own.
- Log on to the School view.
- Click the Student tab. The list of students appears.
- To add the Next School field to your default
field set, click the Field Set
icon
 , then Manage
Field Sets. The Manage Field Sets pop-up appears.
, then Manage
Field Sets. The Manage Field Sets pop-up appears. - Select a field set, and click Edit. The Define Field Set pop-up appears.
- Below 'Available Fields', click the down arrow, and select the Next School table. The fields in the Next School table appear.
-
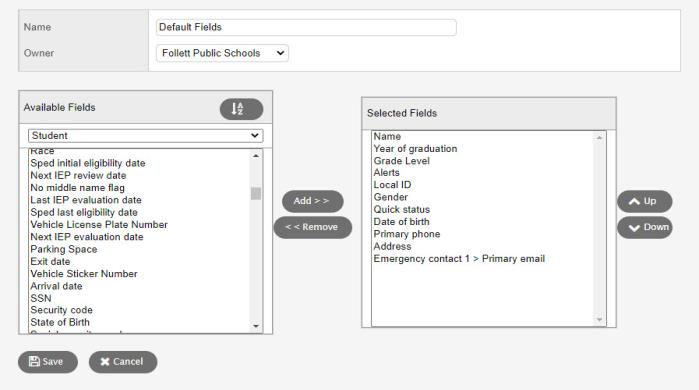
- Select the Name field and click Add. The field appears in the Selected Fields box.
- In the Selected Fields box, select the Name field and click Up to move the field up. This displays the field on the Student List so that you can easily view which next schools you update.
- Click Save. Now, the Next School Name field appears on your Student List.
To
mass update![]() permanently change one set of values to another set of values for the same field the Next School field for
students by year of graduation:
permanently change one set of values to another set of values for the same field the Next School field for
students by year of graduation:
|
Note: Before you perform a mass update, you must select the records you want to work with. If you neglect to do this, you might accidentally mass update all of the records in your database. |
|
Important: It is not possible to reverse a mass update. Proceed with caution. |
- On the Options menu, click Query. The New Query pop-up appears.
-
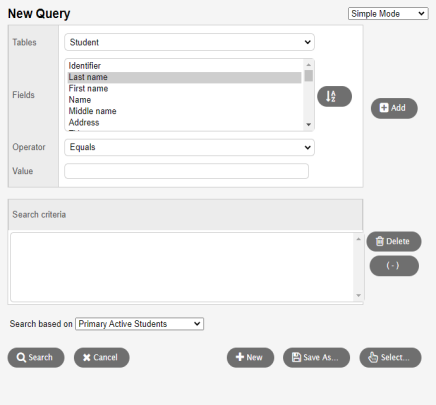
- Create a query
 a request to find a group of records that match specific criteria at a particular time
to search for and select students in a specific year of graduation.
a request to find a group of records that match specific criteria at a particular time
to search for and select students in a specific year of graduation.
- Click Search. Your Student List displays only the students with the year of graduation you specify.
- On the Options menu, click Mass Update. The Mass Update pop-up appears.
- At Field, select Next School.
- At the Value field, select the school that students in that year of graduation will attend next year, or in the year you are building the master schedule for.
|
Note: For students who are moving to another school next year, their current school must associate them to their next school. For example, middle schools must associate their eighth graders to the high school. For seniors who are graduating, select the blank space. The system does not schedule students you do not specify a next school for. |
- Click Update. The system updates the students’ Next School field with the value you select.