Define a survey's details
There are two main steps to setting up a survey:
- Defining its details.
- Adding the content (questions and responses).
The first step to setting up a survey is defining its details. These include a start and end date, and how many questions you want to appear on each page.
To define a survey's details:
- Go to the Page where you added the Survey widget.
- On the widget's title bar, click New. The following pop-up appears:
-
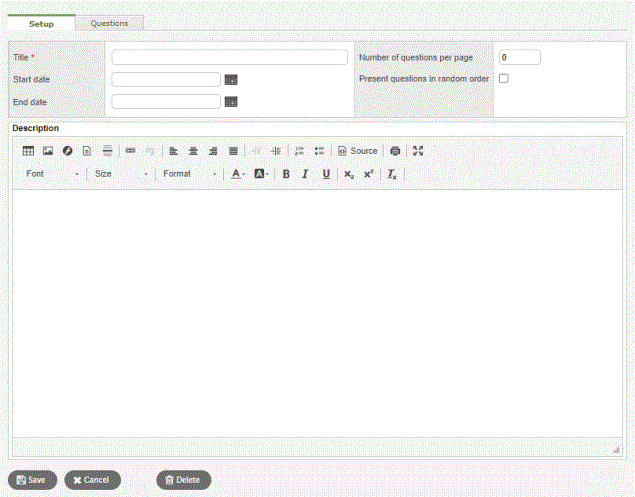
|
Field |
Description |
|
|---|---|---|
|
Title |
Type a title (appears in the widget's title bar). |
|
|
Start date |
Type
or click
|
|
|
End date |
Type
or click
|
|
|
Number of questions per page |
Type the number of questions you want to appear on each page. If you leave this field at 0, all of the questions will appear on the same page. |
|
|
Present questions in a random order |
Do one of the following:
|
|
|
Description |
Type a description of the survey. When users take the survey, they see this description on the first page.
|
- Click Save.