Add a widget to a Page
Once you have created a Page and added members, you are ready to add widgets. Widgets include banners, blogs, group resources, and surveys.
You can add and remove widgets from a Page. Note that if you have global administrator rights for all Pages (and cannot navigate to them), instructions for adding and removing widgets are different.
Once you have added widgets to a Page, you can populate them with content (such as typing an announcement or creating a blog entry). Also, you can rearrange your Page's layout at any time.
- Go to the Page you want to add the widget to.
- Click the
Edit Page button
 in the top-right corner. The buttons expand.
 -

Note: If you only have one tab, you will not see the Remove Tab button. A Page Widgets menu appears on the right-hand side of the page. The only widgets in this menu are ones the user has access to. Widgets can be grayed-out for one of two reasons:
- The widget is only meant to be used on the Home page, and you are not currently on the Homepage.
- The widget is only allowed to be used one time per Page, and it has already been used.
- Click on a widget and drag it onto the page. A yellow rectangular dotted line shows where the widget will appear.
-
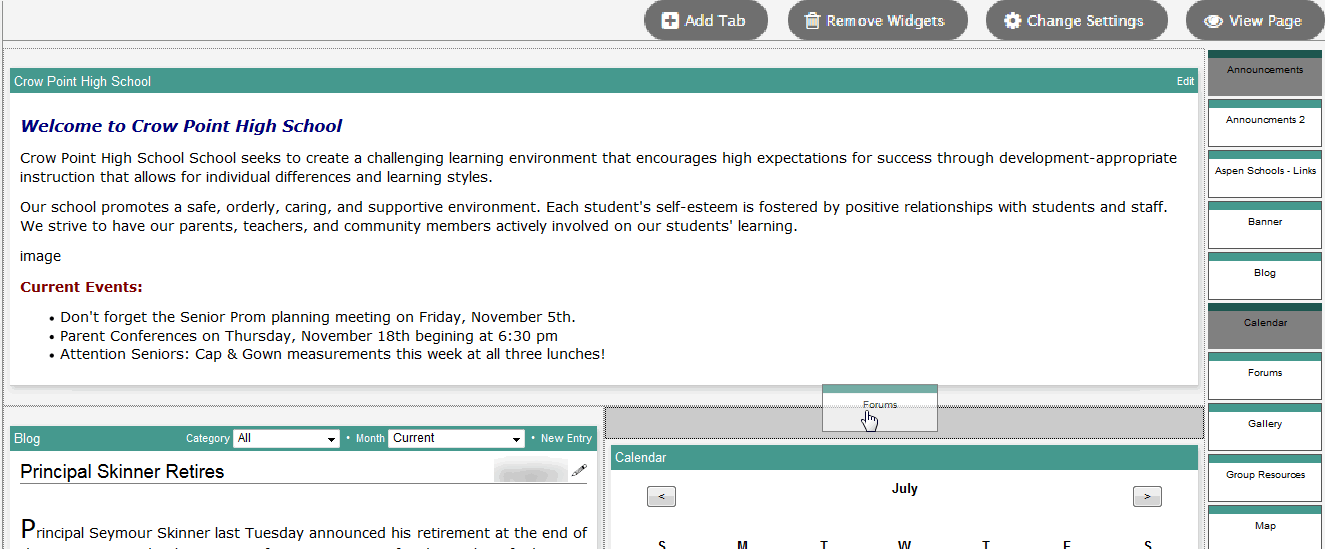
- Release the mouse button to anchor the widget.
- Use the table to make changes to your widget:
-
If you want to... Do this... Change the name in the widget header (title bar)
Double-click the widget header and enter a new title.
Move the widget to a new location
To rearrange widgets, you must be in Edit mode (have clicked Edit Page). Then, just click anywhere in the title bar of the widget you want to move and drag to the location of choice.
Note: If you drag a widget onto an area that currently houses a two-column widget, your widget will also span two columns. If you drag it onto a one-column widget, your widget will span one column. Release your mouse button when satisfied. Edit a widget's content
Click the Edit link (might also be called New Entry or Add Forum, depending on the widget) in the widget's title bar.
Note: Each widget type is edited slightly differently. Delete a widget
- Click View Page to return to View mode for the Page, without the edit buttons.
To add a widget to a Page as a global page administrator:
- Log on to the
- Click the
- Select the group whose Page you want to add a widget to.
- Click the Page Tabs side-tab, then Page Widgets.
- On the Options menu, click Add. The New Group Page Widget page appears.
- At the Widget
Definition > Title field, click
 to select
a widget and click OK.
to select
a widget and click OK. - In the Title field, enter the text you want to appear in the widget's header.
- Click the Position drop-down to select left, right, or top.
- In the Order
field, type a number to determine the widget's position.
Note: The numbers are not as important as the relationship between them. For example, left2 is above left4. All top items span two columns.
- Leave the Parameters field blank. It currently is not used.
- Select the checkboxes next to the views where this widget should appear. For instance, select the Student view checkbox if you want students to be able to see the widget using the Student portal. Select the Family view checkbox if you want parents to be able to see the widget using the Family portal.
- Click Save.
To remove a widget from a Page:
- Go to the Page containing the widget you want to remove.
- Click Edit Page in the top-right corner. A series of buttons appears.
- Click Remove Widgets. A Delete link appears on all the widgets on the page.
-

- Click Delete on the widget you want to delete. A confirmation message appears.
- Click Yes.
To remove a widget from a Page as a global page administrator:
- Log on to the
- Click the
- Click the Groups side-tab.
- Select the group whose Page you want to remove a widget from.
- Click the Page Tabs side-tab, then Page Widgets.
- Select the widget you want to remove.
- On the Options menu, click Delete.