Create or edit a sort order
Use the Sort Order menu to determine the order that records appear in on any list page. For example, maybe you would like to see students ordered by street name. It is also possible to sort on multiple criteria and to use a reverse sort order.
Sort orders change the order of rows on a list page. To change the order of columns, edit the appropriate field set.
|
Notes:
|
|
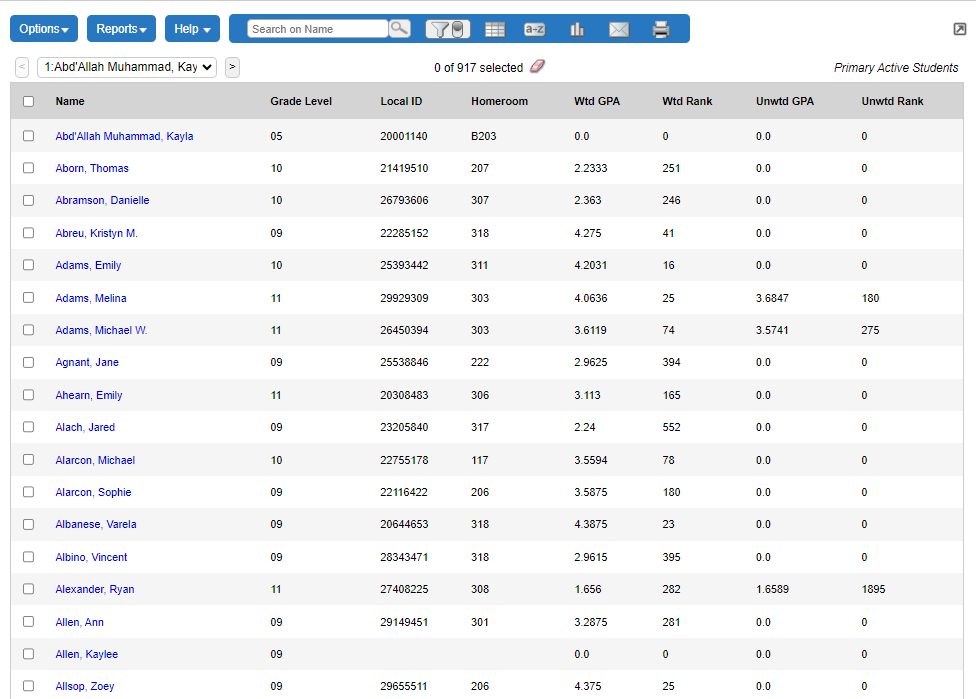
Example: You first sort by Weighted GPA, and all the data is organized by that field. You then sort by Grade Level, and the data is organized by that field. Aspen remembers that you previously sorted by Weighted GPA, so while the data is sorted by Grade Level overall, within each grade level, the data is sorted by Weighted GPA. Aspen remembers up to three columns.
|
To create or edit a sort order for a page:
- Click the Sort Order icon
 ,
and then select Manage Sort Orders. The Manage Sort Orders pop-up appears.
,
and then select Manage Sort Orders. The Manage Sort Orders pop-up appears.
- Do one of the following:
- To create a sort order, click New.
- To modify a sort order, select the sort order to highlight it, and click Edit. The Define Sort Order pop-up appears.
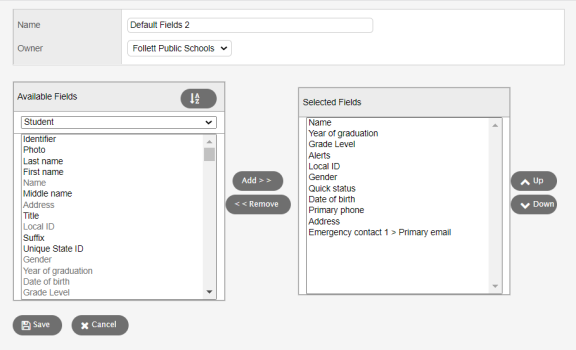
- At the Name field, type or edit the name for the sort order.
- Click the Owner drop-down to select who will have access to the sort order:
- If you do not have access
to set school or
- If you have appropriate
access,
you can select your
- If you have appropriate access and are in the
- If you have appropriate access and are in the School view, you can select your school as the Owner. If you do this, all users in the school will see this sort order in their list.
- If you are creating this sort order for yourself only, select your name.
- Select the fields in the Available Fields list that you want to include in your sort order.
-
Note: Fields within each reference table are listed from most commonly used to least commonly used. To change this sort order to alphabetical, click the Alpha Sort button
.
- Click Add.
- Do any or all of the following:
- To remove a field: Select it to highlight its name in the Selected Fields list, then click Remove.
- To change the order of the sort: Select it to highlight its name in the Selected Fields list, and then click Up or Down.
-
Note: In the Selected Fields list, the order of fields top-to-bottom is the order the system will sort by. For example, if School Name is at the top of your list, all of the records for students at the Allen School will be listed first. The second field on your list, Year of Graduation, is your secondary sort within the primary sort. This means that within each school, records will be grouped by students’ year of graduation.
- To reverse a sort order: Highlight a field in the Selected Fields list, and click Change sort.
-
Example: If your selected field is Physical Address > Street name and you click Change sort, the records on your list page will appear alphabetically from Z to A instead of A to Z.
-
Note: The letters (desc) appear next to the field name in the Selected Fields box. To cancel a "change sort," highlight the field name and click Change sort again. (desc) disappears.
- When the Selected Fields list contains all of the fields you want to sort by in the appropriate order, click Save. The Manage Sort Orders pop-up displays the sort order you created or edited.
- Click Close.
- To test your new
sort order, select it from the Sort
Order menu . The
page displays the records in the order you specified.